
Reading Time: 12 Minutes
Difficulty Level: Beginner to Intermediate
Reviewed By: FinanceInfoIn Editorial Team.
Jump-Starting a Car: A Free Fix or a $1,200 Mistake
Reaching for jumper cables feels like a simple, free way to get back on the road. But today's cars are really computers on wheels, and they don't forgive mistakes easily.
Connect a clamp to the wrong terminal, even for a split second, and a sudden reverse-voltage surge can race through the electrical system. It can blow major fuses, damage the alternator, and even ruin the Engine Control Unit (ECU). That kind of repair often costs somewhere between $1,000 and $1,500.
The good news is that this is easy to avoid once you know the right order of steps. Learning how jump-starting really works isn't only about getting your car running again. It's about protecting the most expensive electronics in your vehicle from a very costly slip.
Quick Summary
Jumping a dead car battery seems like a simple task, but one wrong move can cause thousands of dollars in electrical damage or serious physical injury. This guide covers the exact errors people make, from crossing wires to choosing the wrong grounding point. You will learn how to protect your engine control unit, prevent battery explosions, and select the right equipment. Follow these steps to ensure you never turn a minor inconvenience into a major repair bill.
Key Takeaways
- Never connect the negative cable directly to the dead battery's negative terminal.
- Reversing the polarity can instantly destroy your car's main computer systems.
- Always inspect the battery for leaks, cracks, or freezing before attempting a jump.
- Cheap, thin cables can melt or fail to transfer enough power to start the engine.
- Removing the cables in the exact reverse order is just as important as connecting them.
The Freezing Reality of a Silent Engine
The wind was howling, and the temperature had dropped severely. I was stranded in the dimly lit parking lot of a grocery store, staring blankly at my open hood.
My hands were numb, and my phone battery was clinging to its last one percent. I had a set of jumper cables in my trunk, but panic started to set in.
I knew the basics of jumping a dead car battery. However, standing alone in the freezing rain made me doubt everything I had ever learned about cars.
If I connect the red clamp to the wrong metal post, will the battery explode? What if I accidentally fry my car's entire computer system?
These fears are completely valid and highly common. Most of us are taught how to jump a car by a well-meaning friend or family member in a rushed situation.
We rarely learn the actual science behind why certain sequences matter. We just mimic what we saw someone else do.

The Hidden Dangers of Reversing the Clamps
One of the most catastrophic errors you can make is reversing the polarity. This means connecting the positive cable to the negative terminal, and vice versa.
Modern vehicles are basically rolling computers. They are packed with sensitive microprocessors, sensors, and electronic control units.
When you cross the cables, you send a massive surge of electrical current flowing in the wrong direction. Your car's electrical system is not built to handle this reversed flow.
Within a fraction of a second, this mistake can blow main fuses. Even worse, it can completely fry the Engine Control Unit (ECU).
Real-Life Case Study: David’s $1,200 Mistake
Let’s look at David, a regular driver who was rushing to get to work. He bought a cheap pair of jumper cables for $15 and accidentally connected the red clamp to the black terminal in the dark. Immediately, sparks flew, and his dashboard went completely dark. Instead of paying $80 for a simple tow truck, David’s reversed polarity error destroyed his car's ECU and alternator. The final repair bill was a staggering $1,250. This simple math shows that rushing a jump start has a massive negative return on investment.
You must always double-check the markings on the battery. Look for the "+" sign for positive and the "-" sign for negative.
Do not rely solely on the color of the cables. Sometimes, aftermarket batteries have different color caps, which can easily trick you.
The Spark That Causes Chaos
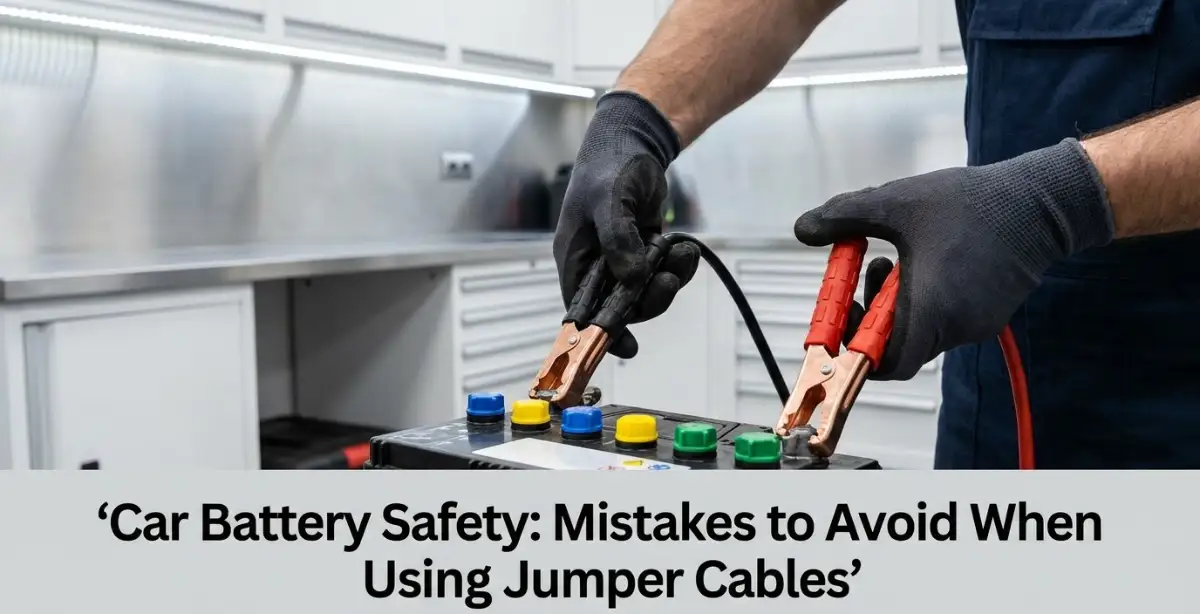
Another incredibly common error is connecting the final black clamp directly to the dead battery's negative terminal. Almost everyone does this, but it is highly dangerous.
Car batteries naturally release hydrogen gas as they charge and discharge. This gas is invisible, odorless, and highly explosive.
When you attach the final clamp to complete the electrical circuit, a small spark will almost always occur. If that spark happens directly over a venting battery, the hydrogen gas can ignite.
This causes the plastic battery casing to explode, spraying corrosive sulfuric acid everywhere. This acid can cause severe burns to your skin and permanent damage to your eyes.
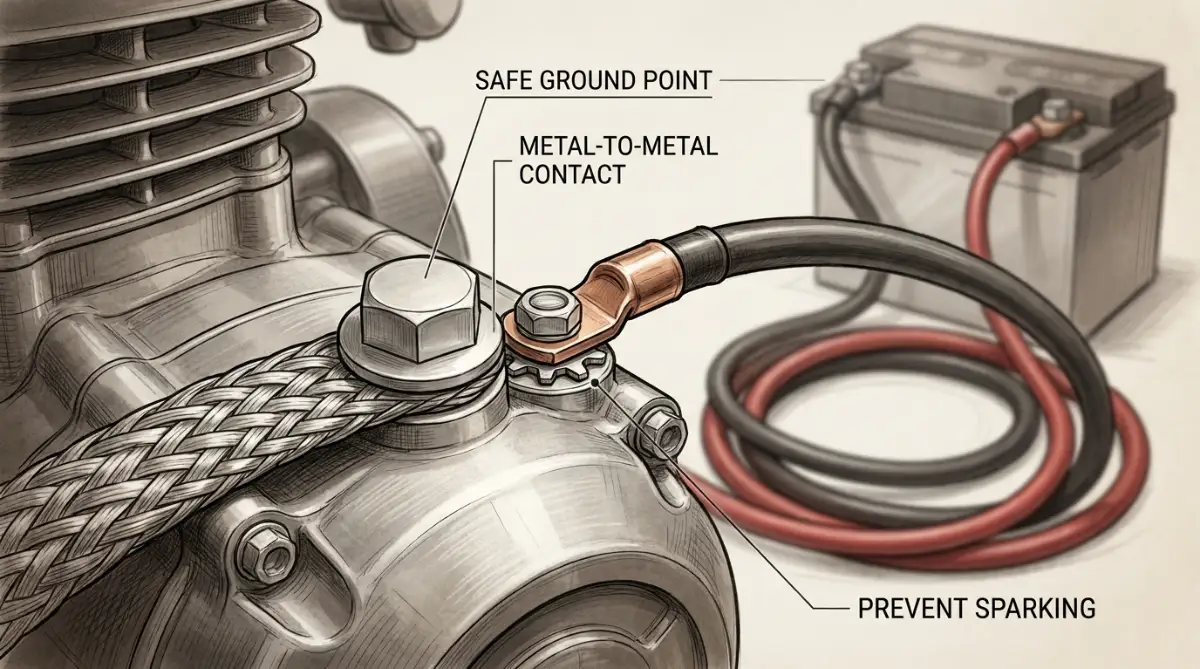
Instead, you must connect the final black clamp to an unpainted metal surface on the dead car's engine block. This is known as a grounding point.
By making this final connection far away from the battery, you keep any potential sparks safely away from the explosive gas.
Expert Tip: Always look for a solid, unpainted metal bolt or a dedicated grounding stud on the engine block. Avoid painted surfaces, as paint acts as an insulator and will prevent a solid electrical connection.
Getting the Connection Sequence Right Every Time
Memorizing the correct order for attaching the cables is non-negotiable. It is the only way to ensure a safe transfer of power.
Always start by making sure both vehicles are turned off. The cars should be close enough for the cables to reach comfortably, but they must never touch each other.
First, connect one red clamp to the positive terminal of the dead battery. Then, take the other red clamp and connect it to the positive terminal of the good battery.
Next, attach one black clamp to the negative terminal of the good battery. Finally, attach the last black clamp to an unpainted metal grounding point on the dead car.
A Pro Tip from My Own Experience: I used to let the metal clamps dangle while I was walking between the cars. One day, the red and black clamps accidentally brushed against each other while connected to a live battery, creating a terrifying shower of sparks. Now, I always carry the cables carefully, ensuring the metal teeth never touch until they are securely clamped to a terminal.
Watch This Expert Demonstration on Safe Cable Connections
Seeing the process in action is the best way to build your confidence. Watch how this mechanic safely identifies the terminals and chooses the perfect grounding spot on the engine block.
Once the engine is running smoothly, you must remove the cables in the exact reverse order. Remove the ground connection first, then the negative from the good car, followed by the positive from the good car, and finally the positive from the newly revived car.
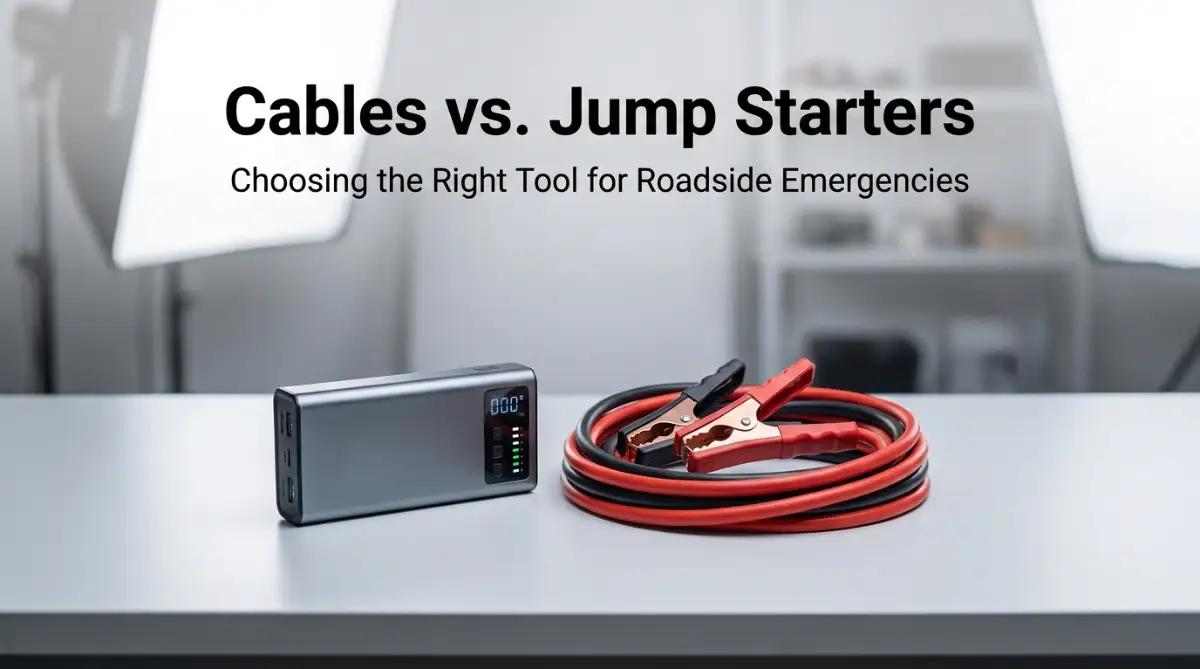
Cables vs. Gadgets: Why Cheap $15 Wires End Up Costing Hundreds
Not all jumper cables are created equal. Buying the cheapest option at the auto parts store is a mistake that will leave you stranded.
Cable thickness is measured in gauges. The lower the gauge number, the thicker the copper wire inside the cable.
Thicker wires can handle more electrical current without overheating. A dead car battery requires a massive amount of amps to turn over the starter motor.
If you use a thin, high-gauge cable (like an 8-gauge or 10-gauge), the wire will restrict the electrical flow. The cables will become extremely hot to the touch, and the dead car simply will not start.
For standard sedans and small SUVs, you should invest in a heavy-duty 4-gauge set of cables. If you drive a large truck or a diesel vehicle, a 2-gauge or 1-gauge set is required.
You should also look for cables with strong, heavy-duty copper-plated clamps. Weak springs in the clamps will result in a poor connection, making the jumping process much harder.
Evaluating the Battery's Physical Condition
Many drivers rush to connect the cables without actually looking at the dead battery first. This is a severe safety hazard.
Open the hood and inspect the physical condition of the battery case. Look for any visible cracks, bulging sides, or severe leaks.
If the battery looks swollen or damaged, do not attempt to jump it. Pushing electrical current into a structurally compromised battery can cause it to rupture violently.
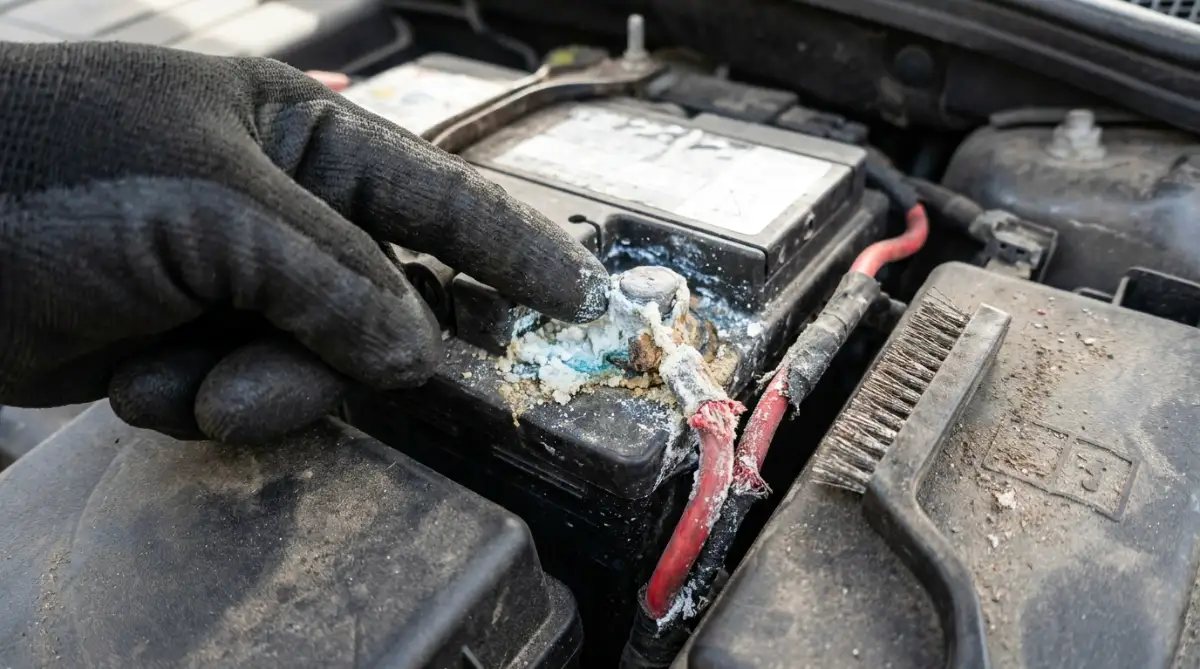
You must also check for heavy corrosion around the metal terminals. Corrosion looks like a fluffy, white or blue powdery substance.
This powder acts as a barrier, stopping electricity from flowing freely between the clamps and the battery post. If you see heavy corrosion, you need to clean it off before attaching the cables.
Use a wire brush or a simple mixture of baking soda and water to scrub the terminals clean. Ensure the metal is shiny so the clamps can bite down and make strong contact.
The Pros and Cons of Jumping a Car Yourself
The Pros:
- Saves money on expensive towing fees.
- Gets you back on the road quickly without waiting hours for roadside assistance.
- Empowers you to handle common automotive emergencies independently.
- Helps you assist other stranded drivers in need.
The Cons:
- Carries a risk of electrical damage if the sequence is done wrong.
- Involves minor physical risk from sparks or battery acid.
- Requires a donor vehicle to be present and willing to help.
Alternatives to Traditional Jump Starting
Sometimes, using traditional cables is not the best option. This is especially true if you are parked in a tight spot where a second car cannot reach you.
Many drivers confuse traditional jump starting with using a portable trickle charger. These two devices serve completely different purposes.
A trickle charger slowly feeds electricity into a battery over many hours. It is used for maintaining a battery, not for an emergency start.
The best modern alternative is a portable lithium-ion jump starter box. These compact devices fit in your glovebox and eliminate the need for a second vehicle altogether.
Portable jump boxes are incredibly safe. Most modern units have built-in reverse polarity protection.
If you accidentally connect the red clamp to the black terminal, the box will simply beep and refuse to send power. It actively prevents you from making the mistakes we discussed earlier.
Regardless of the method you choose, patience is your best friend. After the dead vehicle successfully starts, do not turn the engine off immediately.
The battery is still entirely drained. The car's alternator needs time to generate electricity and recharge the battery cells.
You should leave the engine running and drive the car around for at least twenty to thirty minutes. Try to maintain a steady speed on a highway, as idling in a driveway is less effective for rapid charging.
If you turn the car off too soon, you will likely find yourself needing another jump start immediately. By avoiding these common errors, you protect your wallet, your vehicle, and your personal safety.
Beyond the Basics: Pro Secrets for Electrical Health
Getting your car started is only half the battle. You need to understand how to keep your electrical system healthy so this nightmare does not happen again.
Most drivers think a simple drive around the block will fully recharge a deeply drained battery. This is a massive misunderstanding that leaves people stranded twice in one day.
Your car's alternator is designed to maintain a healthy battery, not to resurrect a completely dead one. If you only drive for five minutes, the battery cells will remain incredibly weak.
To achieve a full recovery, you should take your vehicle for a continuous highway drive lasting at least thirty to forty minutes. This steady RPM allows the alternator to output a consistent, strong electrical current.
If you own an electric vehicle, the rules change entirely. You can learn more about how to safely extend the battery life of an electric vehicle using entirely different maintenance strategies.
Cold weather is another silent enemy of automotive electronics. Freezing temperatures literally slow down the chemical reactions inside your battery casing.
If you live in a cold climate, parking in a garage or using a thermal battery blanket can save you countless headaches. Understanding how to charge your electric car in freezing temperatures is just as important for EV owners dealing with similar cold-weather stress.
To help you separate good advice from dangerous rumors, review the comparison below.
Myth and Reality
Deadly Pitfalls You Must Avoid at All Costs
When you are stranded on the side of a busy highway, panic takes over your brain. This rush of adrenaline makes smart people do incredibly dangerous things.
The biggest trap drivers fall into is rushing the visual inspection. They grab the metal clamps and just start hooking things up without checking the battery's physical health.
If your battery has frozen solid overnight, applying electrical current will cause it to explode violently. You must always check the plastic casing for bulging sides or ice inside the cell caps.
Another massive pitfall is letting the metal clamps dangle freely while the other end is connected to a live power source. If a live red clamp touches a live black clamp, it creates a terrifying electrical arc.
This short circuit can instantly weld the metal teeth together or start a severe engine fire. Always carry the cables carefully, keeping the positive and negative ends far apart.
Common Mistakes
- Ignoring the specific positive and negative symbols molded into the plastic battery casing.
- Assuming the red protective cap always means positive, as aftermarket parts can be mixed up.
- Trying to jump a heavy-duty diesel truck using a small compact car's electrical system.
- Leaning your face directly over the battery while making the final electrical connection.
- Failing to turn off the headlights, radio, and air conditioning before attempting the start.
If you ignore these warnings, the consequences are incredibly expensive. Modern vehicles have sensitive computer modules that cost thousands of dollars to replace if you fry them with a power surge.
Sometimes, what appears to be a battery issue is actually a charging system failure. If you ever wonder why is my ev charging so slow or why your gas car dies immediately after a jump, the root cause is usually deeper.
For gas-powered vehicles, dying immediately after the jumper cables are removed means your alternator has completely failed. The alternator is no longer generating electricity to keep the spark plugs firing.
Here is a quick diagnostic guide to help you understand what your vehicle is trying to tell you.
Your Fail-Proof Roadside Action Plan
Now that you understand the science and the dangers, it is time to put this knowledge into practice. You need a structured approach to handle this emergency smoothly.
Instead of guessing, you must follow a strict, calculated process. This exact method is used by professional tow truck drivers and roadside mechanics every single day.
Whether you are preparing for a long commute or trying to maximize your electric vehicle range, having a structured emergency plan reduces anxiety.
The Exact Step-by-Step Execution Guide
Step 1: Park the donor vehicle close enough for the cables to reach comfortably, but ensure the two cars never physically touch each other.
Step 2: Turn off the ignitions in both vehicles and remove the keys to prevent any accidental power surges.
Step 3: Clean any heavy white corrosion off the battery terminals using a stiff wire brush or a thick cloth.
Step 4: Connect the first red clamp to the positive terminal of the dead battery, ensuring the metal teeth bite down hard.
Step 5: Connect the second red clamp to the positive terminal of the good, working battery.
Step 6: Attach the first black clamp to the negative terminal of the good battery.
Step 7: Clamp the final black clamp onto an unpainted, solid metal surface on the dead car’s engine block, away from the battery.
Required Gear Preparation Checklist
- A heavy-duty set of 4-gauge or 2-gauge copper-plated jumper cables.
- A thick pair of rubber-coated mechanic gloves to protect your hands from acid and sparks.
- A sturdy wire brush for scraping away hardened battery acid and corrosion.
- A bright LED headlamp so you can keep both hands free while working in the dark.
- Safety goggles to protect your eyes from any unexpected chemical splashing.
Pro Tip: I always keep a dedicated emergency kit strapped down in my trunk. If you store your cables loosely, the metal clamps can get crushed by heavy groceries, ruining the internal springs before you even get to use them.
Having the right tools physically in your trunk is the only way to guarantee your safety. You cannot rely on strangers to have high-quality equipment.
Quick Action Checklist
- Verify the safety of your surroundings before stepping out of the vehicle.
- Turn on your hazard lights and set up reflective warning triangles.
- Visually inspect the dead battery for any cracks, leaks, or swelling.
- Identify a solid, unpainted grounding point on the engine block beforehand.
- Double-check the positive and negative signs before making any connections.
Below is a breakdown of how to organize your trunk for maximum safety during a roadside emergency.
Moving Forward With Confidence
I used to dread the clicking sound of a dead ignition. The sheer panic of being stranded in a dark parking lot would ruin my entire day.
By memorizing this exact connection sequence, I transformed that fear into quiet confidence. You now have the knowledge to protect your vehicle's sensitive computers and keep yourself physically safe.
Taking control of your car's maintenance is an incredibly rewarding feeling. You are no longer at the mercy of expensive tow trucks or dangerous guessing games.
Have you ever accidentally sparked your cables or fried a fuse while trying to jump a car? Let me know about your craziest roadside breakdown story in the comments below!
Frequently Asked Questions About Safe Jump Starts
Can I jump start a modern car with a hybrid vehicle?
It is generally not recommended to use a hybrid vehicle to jump a traditional gas car. Hybrids have smaller 12-volt auxiliary batteries that are not designed to output the massive cranking amps required to turn over a heavy gas engine.
What happens if the red and black cables touch each other?
If the clamps touch while connected to a power source, it creates a massive short circuit. This will produce aggressive sparks, melt the metal clamps, and potentially cause a dangerous battery explosion or electrical fire.
How long should I leave the cables connected before starting the dead car?
After making the final ground connection, let the donor vehicle run for about three to five minutes. This allows a safe transfer of surface charge into the dead battery before you place a heavy load on the system.
Is it safe to jump a car in the rain?
Yes, it is generally safe to jump a car in the rain because a 12-volt automotive system does not have enough voltage to electrocute you through wet skin. However, you must keep the cable clamps completely dry before attaching them to prevent slipping.
Why does my car keep dying overnight even after a jump?
If your battery drains entirely overnight, you likely have a parasitic electrical drain. This happens when a stuck relay, interior light, or faulty radio continues to pull power even when the ignition is completely turned off.
Do I really need to wear safety glasses during this process?
Yes, wearing safety glasses is highly recommended by automotive professionals. Car batteries contain volatile sulfuric acid and explosive hydrogen gas, making eye protection your best defense against unexpected chemical reactions.
Can a totally dead battery be brought back to life?
If a battery has been completely dead and sitting for several months, the internal lead plates will sulfate and harden. At that point, a standard jump start will not work, and the battery must be completely replaced.
Why do my jumper cables get incredibly hot?
If your cables become hot to the touch, they are likely too thin (high gauge) for the vehicle you are trying to start. The wire is resisting the electrical flow, which generates dangerous heat and prevents the car from starting.
Where is the best grounding point on an engine?
The ideal grounding point is an unpainted, heavy metal bolt or bracket attached directly to the engine block. Avoid painted surfaces, thin aluminum brackets, or moving parts like belts and cooling fans.
Should I turn off the donor car before removing the cables?
No, you should leave both vehicles running while you carefully disconnect the cables in the exact reverse order. This ensures the newly started vehicle is relying entirely on its own alternator for power.
Trusted Automotive Electrical Safety & Consumer Resources
To research automotive battery standards, electrical safety regulations, and certified repair guidelines, explore these authoritative resources:
-
National Highway Traffic Safety Administration (NHTSA) – Battery Safety & Hazards: (Federal safety regulations governing vehicle 12-volt battery standards, explosive gas venting, and roadside emergency protocols)