
Reading Time: 12 Minutes
Difficulty Level: Beginner to Intermediate
Reviewed By: FinanceInfoIn Editorial Team
The Hidden Cost of a Bad Angle: My Costly Rooftop Discovery
Staring at a zero-production solar app on a freezing morning is the fastest way to ruin a weekend. I remember looking at my phone screen, watching the green status lights turn to a dull, inactive gray. My monthly utility bill had just arrived, and it was barely any lower than before I spent thousands on solar panels.
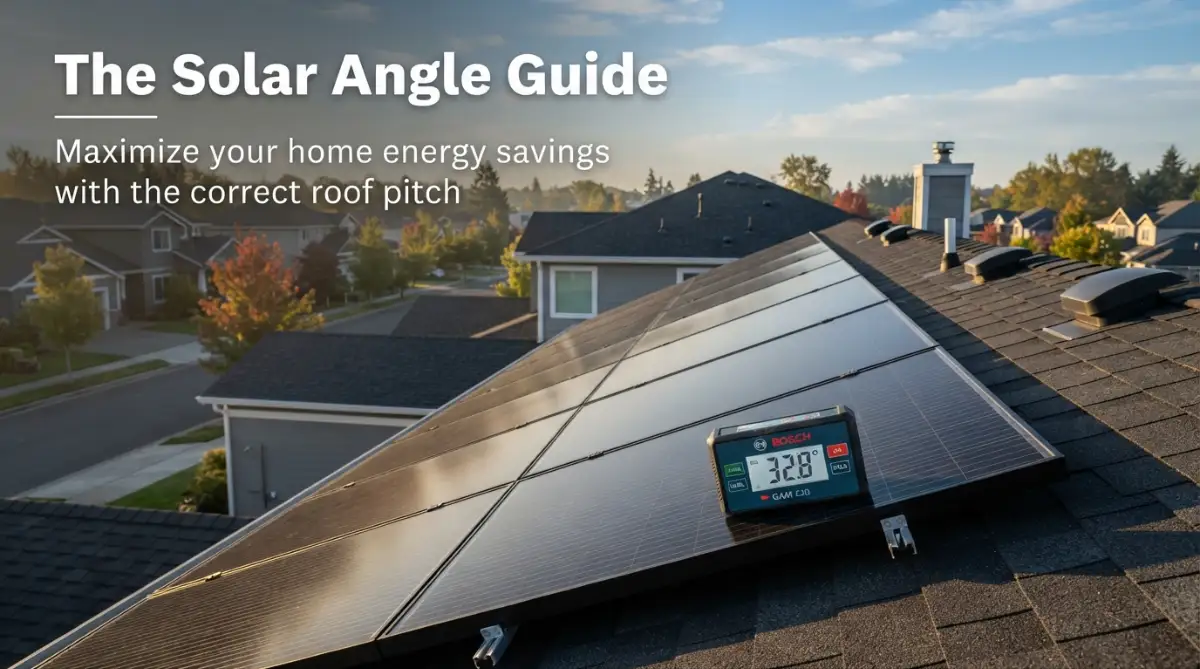
I walked out to my yard, looked up at my roof, and realized the mistake. My panels were lying almost flat on a shallow roof, while the winter sun hung low in the southern sky. The sunlight was simply skimming across the glass sheets instead of hitting them directly.
Many homeowners think that just putting solar panels on a roof is enough to stop paying high power bills. They do not realize that the slope of their roof plays a massive role in how much energy they generate.
When your panels sit at an incorrect tilt, you lose usable electricity every single day. Over a decade, this small calculation mistake can add up to thousands of dollars in lost savings.
We purchase solar systems to gain energy independence and protect our wallets from rising utility rates. However, living with an unoptimized system causes constant stress.
You watch clear, sunny days go by, yet your electric meter keeps spinning fast. It feels like you bought a high-performance sports car but can only drive it in first gear.
Let us fix this issue by looking at how roof pitch and geographic location work together. This guide will show you how to find the sweet spot for your home solar panels.
Quick Summary
An optimal solar panel angle matches your local latitude to receive direct sunlight throughout the year. If your roof is too flat or too steep, solar installers use special mounting brackets to adjust the tilt. Getting this angle correct can increase your daily energy production by up to twenty percent.
Understanding the Core Science of Solar Angles
To get the most electricity from a solar cell, the sun's rays must hit it at a perfect ninety-degree angle. When the light strikes the glass face perpendicularly, the solar cells absorb the maximum amount of photon energy.
If the light hits at a sharp, glancing angle, much of the energy reflects off the glass surface and escapes back into the air.
Your roof pitch represents the slope of your roof structure. In construction, this is usually written as a ratio, like a 4/12 pitch, which means the roof rises 4 inches for every 12 inches of horizontal run.
In the solar world, we convert this slope into degrees. A 4/12 pitch translates to roughly an 18.4-degree angle.
Your geographic location determines how high the sun climbs in the sky. Near the equator, the sun is almost directly overhead throughout the year.
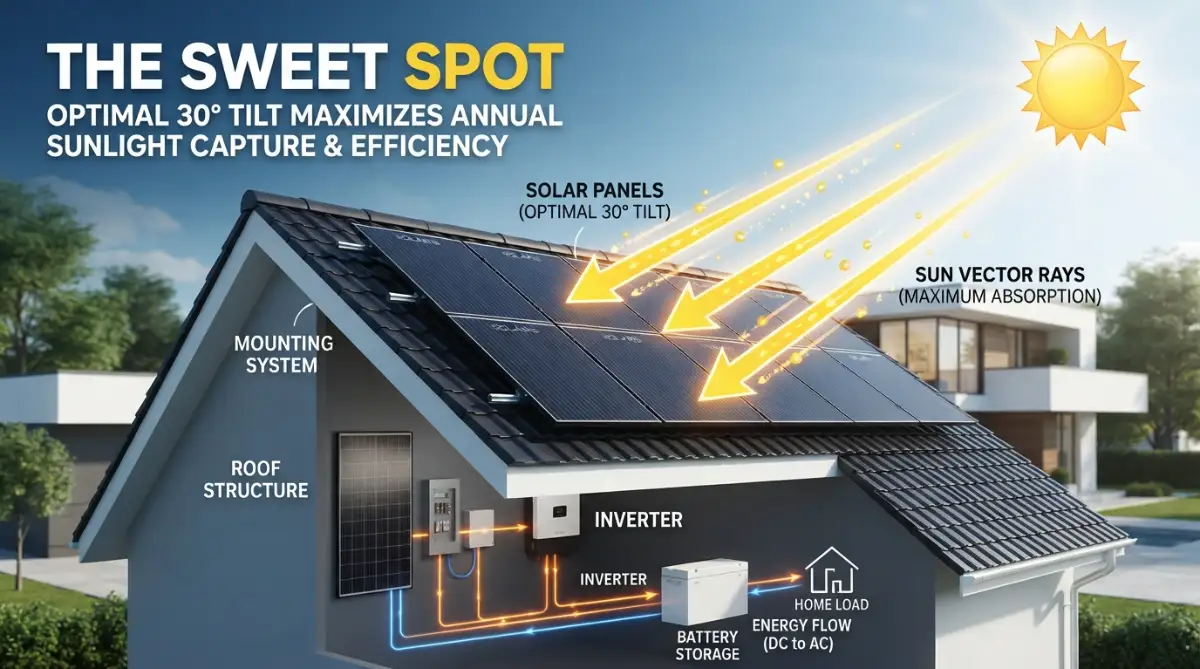
As you move further north or south toward the poles, the sun sits much lower on the horizon. Therefore, homes in northern states require a steeper solar tilt to face the low winter sun.
Confusing Alternatives: Roof Angle vs. Roof Orientation
Many homeowners use these two terms interchangeably, but they control completely different parts of solar energy capture.
Latitude: The Golden Rule for Solar Tilt
As a general rule of thumb, the best angle for your solar panels is equal to the latitude of your home. If you live in Los Angeles, California, your latitude is approximately 34 degrees. Therefore, the optimal year-round angle for your panels is 34 degrees.
If you live in Seattle, Washington, your latitude is around 47 degrees. Your solar panels should ideally be tilted at a much steeper 47-degree angle to face the lower northern sun.
However, most residential roofs do not match these numbers perfectly. Standard home roofs are built at pitches between 15 degrees and 25 degrees.
Do not panic if your roof pitch is shallower than your latitude. A variance of 10 to 15 degrees will only cause a minor drop in annual energy production, usually around three to five percent.
Real-Life Math: Sarah's Denver Solar Case Study
Let us look at a real-life scenario to see how this math plays out in the real world.
Sarah lives in Denver, Colorado, which sits at a latitude of 39.7 degrees. She installs a standard 8-kilowatt (kW) solar panel system on her home. Her installer offers her two different setup options for her roof.
Option A: Installing Panels Flat on Her Roof
Sarah’s roof has a very gentle 15-degree slope. If she mounts the panels flat against the shingles without any special racking, her panels sit at 15 degrees.
Because Denver is far north, this shallow tilt causes her system to lose significant sun exposure during the long winter months when the sun stays low.
Her system produces approximately 10,800 kilowatt-hours (kWh) of electricity per year.
Option B: Using Tilt Racks to Reach the Ideal Angle
The installer uses adjustable aluminum tilt brackets to raise the panels to a 40-degree angle, matching Denver’s latitude. This steeper tilt catches the winter sun beautifully and allows heavy snow to slide off the slick glass face naturally.
Her system now produces approximately 12,150 kWh of electricity per year.
The Financial Impact
By correcting the angle, Sarah gains an extra 1,350 kWh of clean electricity every year.
At a local utility rate of 15 cents per kWh, this simple angle adjustment saves Sarah an extra $202.50 annually. Over a twenty-year period, this single decision saves her more than $4,050.
How to Measure Your Current Roof Pitch
You do not need to climb onto your roof with a ladder and a giant protractor to find your roof angle. You can estimate your roof pitch safely from inside your attic or by using a smartphone app.
First, download a free smart level or clinometer app on your mobile phone. These apps use your phone's internal sensors to measure angles instantly.
Go into your attic space and place your phone flat against one of the wooden roof rafters. The app will immediately display your roof slope in degrees.
Alternatively, you can measure your pitch using a simple level and a tape measure. Hold a 12-inch level completely flat against your roof rafter.
Measure the vertical distance from the end of the level down to the wood rafter. If the drop is 4 inches, you have a 4/12 pitch, which equals an 18-degree angle.
Ideal Angle Estimates by Regional Latitude
The table below shows the ideal year-round solar tilt angles for different geographic zones across the country.
Watch this helpful demonstration to see how installers measure and set the perfect roof angle on various shingle surfaces
Solving Angle Problems on Flat and Steep Roofs
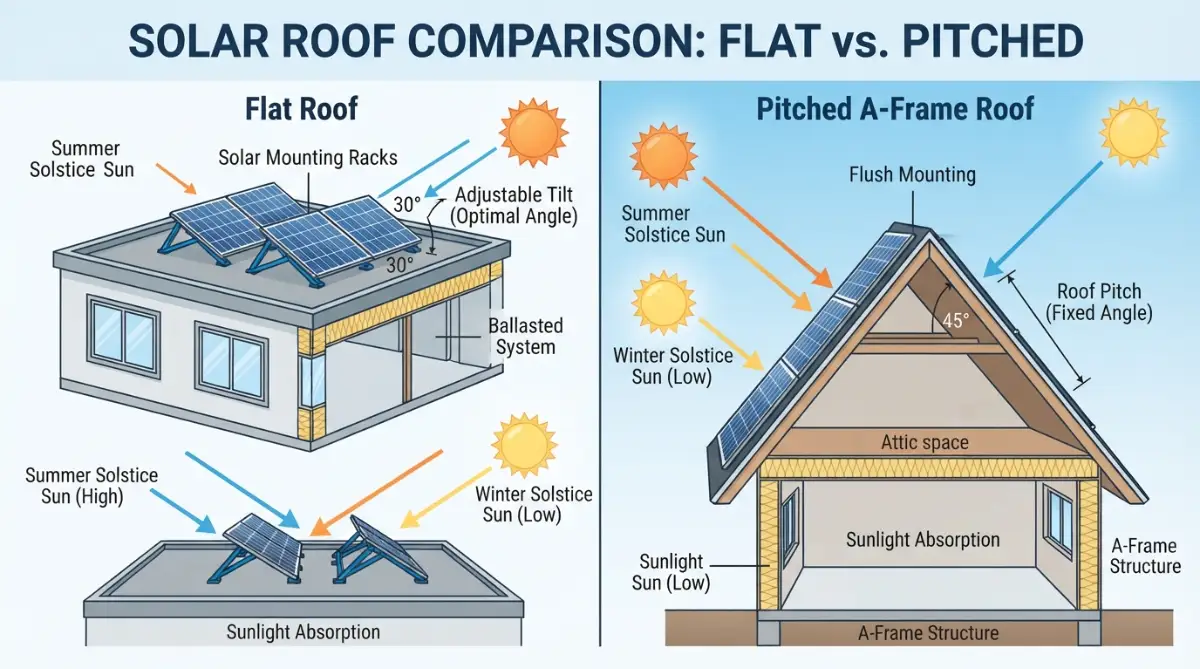
What happens if your house has a flat roof? Flat roofs are common on modern homes and commercial buildings.
If you lay solar panels flat on a roof, they will collect dirt, autumn leaves, and rainwater. This dirty buildup blocks the solar cells and quickly ruins your energy production.
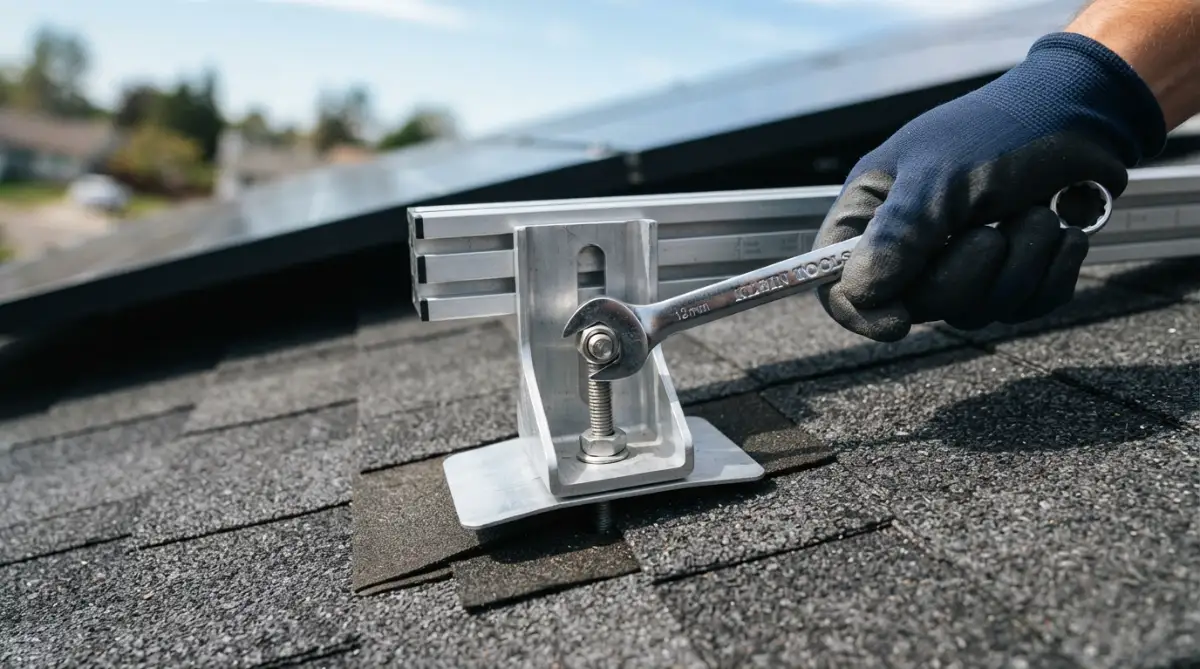
To solve this, installers use tilt-up metal frames called ballast mounts. These heavy aluminum frames hold the panels at an angle of 10 to 15 degrees without requiring any holes to be drilled into your roof membrane.
The weight of concrete blocks holds the frames securely in place against high winds.
If your roof is incredibly steep, like a classic A-frame cabin, the angle might be 50 or 60 degrees. While this works well for catching winter light in northern areas, it reduces your summer production significantly.
In this scenario, installers often mount the panels on a nearby ground rack or use special flush mounts on a different section of the house.
Honest Pros and Cons of Modifying Your Solar Angle
Before you buy expensive racking systems to change the tilt of your solar panels, you must weigh the benefits against the potential downsides.
The Pros
- Maximum Daily Production: Your system works at peak efficiency, generating more electricity per square foot of panel space.
- Natural Snow Shedding: Panels tilted at angles greater than 35 degrees allow heavy snow to slide off quickly, keeping your system clear.
- Less Cleaning Required: Rainwater flows down angled panels easily, washing away dust, bird droppings, and pollen naturally.
The Cons
- Higher Installation Costs: Special tilting racks and wind-resistant hardware cost more money upfront than flat roof mounts.
- Wind Damage Risks: Angled panels act like sails on your roof, catching high winds and putting extra stress on your home's roof rafters.
- Aesthetic Concerns: Raised tilt frames are highly visible from the street, which some homeowners find visually unappealing.
Expert Tip: The Winter Bias Strategy
"If you cannot set your panels to the exact year-round latitude angle, I highly recommend biasing your angle slightly steeper toward the winter sun. During the summer, the sun stays in the sky for many hours, meaning you will have plenty of power regardless of your angle.
In the winter, however, days are short and sunlight is scarce. A steeper angle helps you squeeze every possible drop of energy out of those short winter days when your heating bills are at their highest."
Seasonal Adjustments: Are They Worth the Effort?
Some high-end solar installations feature adjustable racking systems. These systems allow you to change the angle of your panels manually or automatically throughout the year.
For example, you might tilt your panels to 20 degrees in the summer and adjust them to 50 degrees in the winter.
While this sounds great in theory, manual seasonal adjustments are rarely worth the physical effort. Climbing onto a high roof with wrenches four times a year is dangerous and time-consuming.
If you forget to change the angles, your system will perform worse than a standard fixed setup.
Automatic tracking systems use electric motors to follow the sun across the sky every day. However, these systems are expensive to install and contain many moving parts that can break down over time.
For the average homeowner, it is much cheaper and more reliable to simply install one or two extra solar panels to make up for any minor angle losses.
Comparing Fixed vs. Adjustable Solar Panel Mounts
This table breaks down the practical differences between fixed racking systems and adjustable systems.
Final Action Steps for Homeowners
To ensure your home solar installation runs at peak efficiency, follow these simple action steps:
- Find Your Latitude: Look up your city's latitude online to identify your target solar angle.
- Check Your Roof Pitch: Use a smartphone app in your attic to find your current roof slope.
- Calculate the Gap: If your roof pitch is within 15 degrees of your latitude, a simple flat mount will work perfectly.
- Ask About Racking: If you have a flat roof or a very steep slope, ask your local solar contractor about specialized tilt mounts.
- Keep It Simple: Avoid complex tracking systems and focus on solid, fixed mounts facing true south for reliable, long-term savings.
Taking Your Solar Performance to the Next Level
Once you understand the basic math behind roof pitches and latitudes, you can start looking at the hidden details that professional installers use. Hitting the exact degree is great, but real life rarely gives us perfect conditions. Trees grow, chimneys cast shadows, and clouds roll in.
If your roof angle forces your panels to sit a bit lower than you want, you can make up for it with smarter equipment. For instance, pairing a less-than-ideal tilt with high-efficiency micro-inverters ensures that even if one panel catches a bad shadow, the rest of your system keeps pumping out electricity.
A flat roof might seem like a disadvantage at first, but it is actually a hidden blessing. Because you are not fighting an existing slope, you have a blank canvas. You can ask your installer to set up ballasted mounts exactly at your perfect latitude degree.
Pro Tip: I highly recommend asking your installer for an annualized shading report before you sign any contract. This report uses software to show exactly how much sunlight your specific roof angle will capture during different seasons, saving you from expensive surprises later.
Sometimes, tweaking the direction your panels face by just a few degrees east or west can completely offset a bad roof pitch. If your roof is too steep for optimal summer production, turning the panels slightly westward can help capture the intense late-afternoon sun when you need air conditioning the most.
Understanding these small adjustments is how you truly how to calculate home solar panel requirements easily without overpaying for massive systems you do not need. A smarter setup always beats a bigger setup.
The Exact Step-by-Step Execution Guide
If you are ready to fix your energy bills and get this process started, here is exactly what you need to do this week.
Step 1: Measure Your Own Starting Point
Grab a ladder, stay safely inside your attic, and use a free smartphone leveling app against your roof rafters. Write down the exact degree of your roof pitch so you have real data before talking to sales reps.
Step 2: Check the Health of Your Roof Surface
Before anyone drills a single hole or installs heavy metal brackets to tilt your panels, you must be sure the structure can handle it. Reviewing how to prep your roof for solar panels and avoid costly leaks is a mandatory step. If your shingles are older than ten years, replace them first.
Step 3: Interview Installers About Racking Options
Call three local, highly-rated solar companies. Instead of just asking for a price quote, ask them specifically how they plan to optimize the tilt angle on your specific roof type. If they say "we just lay them flat," move on to the next company.
Step 4: Request a Production Guarantee
A reputable installer will put their angle calculations in writing. Ask them for a contract clause that guarantees a minimum amount of annual electricity production based on the tilt they recommend.
Quick Action Checklist
Before you sign any paperwork, make sure you have gathered everything on this list.
- A recent copy of your highest monthly electric bill for reference.
- The exact latitude number for your city or zip code.
- A rough measurement of your current roof pitch in degrees.
- Your local Homeowners Association (HOA) rulebook regarding visible panels.
- A structural inspection report if your home is older than twenty years.
- Three different quotes showing different mounting bracket options.
System Performance Expectations Based on Tilt Adjustments
Costly Solar Pitfalls You Must Avoid
I have seen too many homeowners make rushed decisions just because they wanted their panels to look pretty from the street. They force their installers to mount the panels completely flush against a bad roof angle, trading thousands of dollars in energy savings for a slightly sleeker appearance.
This is one of those major solar panel installation mistakes that waste your money quietly over time. You will not notice the damage on day one. But as winter approaches and the sun drops lower, your system production will fall off a cliff.
Another massive mistake is ignoring local weather patterns. If you live in an area that gets heavy snowfall, you simply cannot lay your panels flat. Snow will pile up, freeze, and turn your expensive energy system into a useless sheet of ice for months.
People also forget to consult their local Homeowners Association before adding steep tilt brackets. Raising your panels up by thirty degrees changes the look of your house. If you do not get HOA approval first, they can force you to tear the whole system down at your own expense.