Watching My Solar Dreams Turn Into a Costly Roof Nightmare
I spent months saving money and researching green energy options before making the leap to rooftop solar. I still remember the excitement I felt the morning the installation truck pulled up to my driveway. I truly believed my electric bills would disappear instantly and my energy independence was finally guaranteed.
That excitement evaporated just three months later during a heavy spring snowstorm. I walked into my top-floor hallway to find water dripping steadily through the ceiling drywall, right under the main solar array. I felt completely sick to my stomach as I scrambled for buckets and towels.
When I called the original setup team, they dodged my calls for days and blamed the weather. I eventually had to pay an independent roofing expert to come out and inspect the damage. He took one look at the mounting hardware and pointed out missing waterproof sealants and incorrect flashing techniques.
The financial stress was overwhelming, and the constant worry ruined my sleep for weeks. Every time dark rain clouds formed in the sky, my heart rate spiked with fear. I was stuck paying a heavy monthly solar loan alongside a massive emergency roof repair bill.
So many homeowners jump into clean energy expecting a smooth transition, only to face hidden mechanical failures, poor energy output, or severe home damage. Watching your hard-earned savings wash away due to rushed work or poor planning destroys your peace of mind.
After fixing the installation issues, my system started performing much more consistently, and my electricity bills gradually became lower.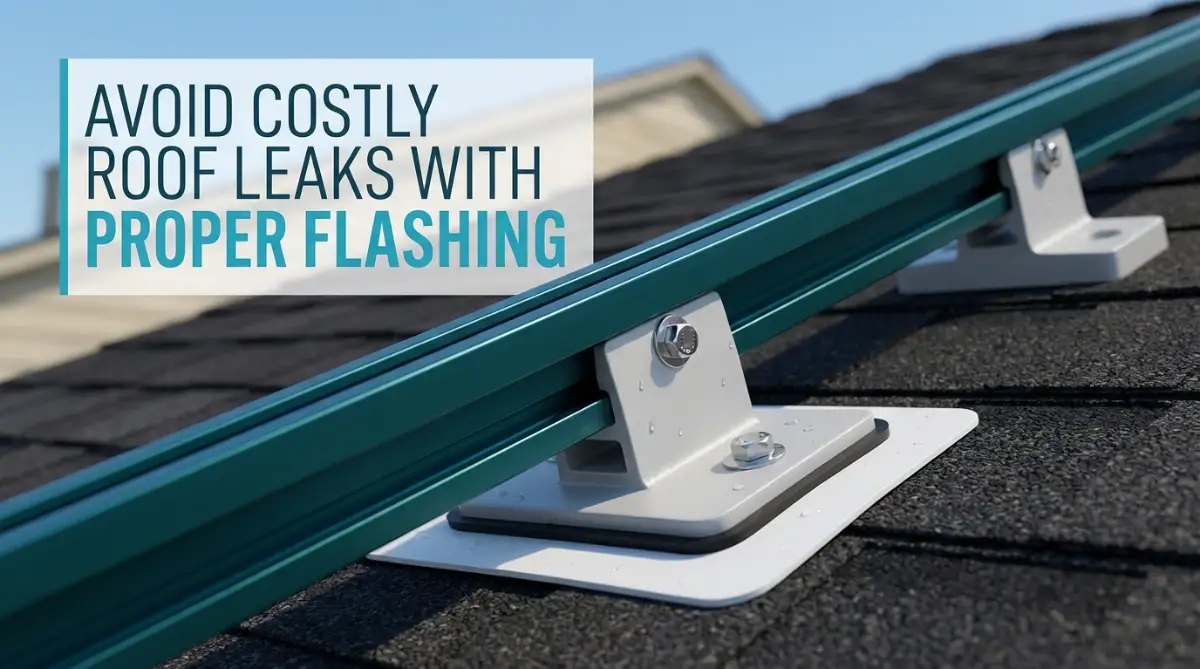
Critical Sizing and Placement Errors That Drain Your Savings
When homeowners decide to generate their own power, they usually focus on buying the most expensive panels available. However, high-end hardware means very little if your system is built on poor calculations and bad placement.
Setting up a renewable energy system requires a complete understanding of how your home consumes electricity throughout the entire year. Skipping proper site evaluations leads to underperforming setups that never pay for themselves.
Let us look closely at the sizing and location errors that keep homeowners from reaching true energy independence.
Miscalculating Your Annual Energy Consumption
One of the most frequent blunders is sizing a system based solely on a single summer power bill. Energy consumption changes dramatically across seasons due to heating systems, air conditioning, and holiday lighting.
If you design a setup based only on mild spring months, your system will fail to cover your power needs during extreme weather. On the flip side, overbuilding a system without good utility net-metering policies wastes thousands of dollars on equipment you do not need.
Always review twelve full months of utility bills to find your true average daily usage in kilowatt-hours. This baseline ensures your system matches your actual family lifestyle rather than an educated guess.
Ignoring Tree Shadows and Roof Angle Dynamics
Trees grow, and shadow patterns shift continuously as the sun moves lower or higher across the horizon throughout different seasons. A roof area that looks completely clear at noon in mid-summer might be heavily shaded by three o'clock in late autumn.
Placing panels in areas that catch morning or afternoon shadows severely cuts down your total daily output. Even partial shade on a single panel can drag down the performance of an entire string of panels if the wiring setup is outdated.
Homeowners should always insist on a professional shade analysis using digital tools before a single bracket is screwed into the roof.
Myth vs. Reality: Solar Panel Direction Misconceptions
The Myth: Solar panels must always face directly south, or they are not worth installing at all.
The Reality: While south-facing roofs often capture high total sunlight, west-facing panels can be far more valuable if your utility company charges peak time-of-use energy rates in the late afternoon. Facing panels slightly west catches the lowering sun right when electricity prices soar.
Hardware and Wiring Missteps That Hurt System Efficiency
Selecting the right panels is only half the battle when building a reliable rooftop power plant. The hidden components beneath the glass modules determine how safely and efficiently energy flows into your home.
Matching the wrong electronics or cutting corners on heavy-duty wiring creates bottleneck points that waste generated power. Over time, these small inefficiencies add up to thousands of hours of lost electricity production.
Understanding the job of each electronic component keeps you from being tricked by low-quality installer quotes.
Choosing the Wrong Inverter Architecture
Solar panels generate direct current electricity, but your home electronics run on alternating current. The inverter is the brain that converts this raw power into usable electricity for your refrigerator, lights, and television.
Many budget setups rely on a single string inverter mounted on the side of the house. In a string setup, all panels are linked together like old-fashioned holiday lights. If one panel gets dirty or catches shade, the output of every other panel in that line drops to match the weakest link.
Microinverters attached to individual panels allow each module to operate independently. If a tree branch shades one panel, the remaining units continue generating power at full capacity.
Inverter System Comparison Matrix
Selecting the correct inverter style for your specific roof geometry prevents unnecessary power loss and protects your long-term investment.
Incorrect Racking and Poor Waterproof Flashing
Your roof is your home's primary shield against rain, snow, and wind. Drilling dozens of holes through shingles to secure mounting racks creates potential entry points for water if proper hardware is ignored.
Budget contractors often rely on cheap caulking or rubber boots that degrade under constant exposure to ultraviolet sunlight. Once the sealant cracks, water slowly seeps under the shingles, rotting the wooden roof deck out of sight.
Ask your installer which flashing system they plan to use and make sure it matches both your roof type and the manufacturer's recommendations. Proper flashing uses gravity rather than chemical sealants to keep your attic completely dry.
Pro Tip from My Own Experience: I learned the hard way that accepting the lowest bid often means getting cheap plastic flashing on your roof mounts. I now tell everyone to explicitly ask for heavy-gauge aluminum flashing plates in their written contract. Paying a tiny bit more upfront for premium mounting hardware saves you from catastrophic water damage bills later.
Here is a great visual breakdown explaining why proper roof attachments and flashing design are essential for long-term home safety:
Neglecting Thermal Expansion Gaps Between Panels
Solar panels contain metal frames and glass that expand when heated by the summer sun and contract during freezing winter nights. Installing panels packed tightly together without proper expansion gaps creates immense mechanical stress.
Without breathing room, expanding frames press against each other, causing microscopic cracks inside the silicon cells. These invisible micro-cracks disrupt internal electrical pathways, permanently ruining panel efficiency over time.
Quality mounting systems include thermal spacing hardware that allows panels to expand and contract safely across temperature swings.
Undersized Electrical Wiring and Loose Terminal Connections
The electricity flowing from your roof to your main breaker panel requires heavy-gauge copper wiring designed for high temperatures and continuous current. Using thin wire sizes saves a contractor money, but it introduces heavy electrical resistance.
Electrical resistance converts your hard-earned solar energy into wasted heat right inside the conduit pipes. In extreme cases, loose wire terminal connections or undersized wiring can melt insulation and create dangerous electrical arc fires.
Professional installers follow strict national electrical codes, using thick, weather-rated copper conductors inside rigid metal conduit pipe.
Skipping Local Building Permits and Utility Interconnection Rules
It is tempting to rush the installation process so you can turn the system on and start saving money right away. However, operating a rooftop generation system without local building permits and formal utility interconnection agreements is a massive mistake.
Power companies have strict safety rules to protect line workers fixing storm damage in your neighborhood. If your system back-feeds electricity into the grid during a power outage, it can fatally injure technicians working on power lines.
Unpermitted systems can result in heavy municipal fines, forced shut-downs, and the complete cancellation of your homeowner insurance policy.
Always wait for official permission to operate from your local utility company before turning on your system breaker.
Forgetting to Plan for Roof Replacement Needs
Placing a twenty-five-year solar system on top of a fifteen-year-old asphalt shingle roof is asking for financial trouble. In a few short years, you will be forced to pay a solar crew thousands of dollars just to detach and remove the panels so a roofer can replace the shingles.
Once the new roof is finished, you have to pay that solar crew a second time to re-install and re-seal the entire system.
If your roof shingles are older or showing signs of wear, always replace the roof before installing solar brackets. Combining both projects often saves on scaffolding costs and ensures your roof and solar panels age together gracefully.
Taking time to avoid these mechanical and legal pitfalls keeps your green energy journey safe, affordable, and stress-free.
Pro-Level Strategies for Maximum Energy Yield and System Longevity
Once you avoid the basic mechanical errors, you can focus on advanced strategies that keep your system running at peak performance. Managing a rooftop solar system is an ongoing relationship between your home, the weather, and your electrical habits.
Taking a proactive approach to system monitoring and maintenance ensures you catch minor issues before they turn into major repair bills. Experienced solar owners use specific techniques to squeeze every possible kilowatt-hour of energy out of their roof setup.
Let us explore the expert-level secrets that protect your long-term energy returns and keep your hardware operating smoothly.
Managing Cable Run Voltages and Resistance Losses
Electricity traveling from your roof down to your main electrical service panel encounters natural resistance inside the copper wires. If the distance between your panels and your inverter is long, using standard wire gauges results in noticeable voltage drop.
A high voltage drop means generated energy turns into wasted heat before it ever reaches your home appliances. According to technical standards published by the U.S. Department of Energy, keeping total system voltage drop below two percent is necessary for optimal power harvesting.
Professional designers calculate wire resistance based on total distance and expected current. Requesting thicker gauge copper conductors for long wire runs keeps your energy losses to an absolute minimum.
Protecting Under-Panel Wiring from Rodents and Environmental Hazards
The warm, sheltered space underneath a rooftop solar array creates an attractive nesting area for squirrels, pigeons, and raccoons. These animals frequently chew through high-voltage wiring insulation, causing short circuits and ground fault errors.
Repairing chewed wires under panels requires hiring a crew to detach the modules, which costs significant time and money. Installing heavy-duty steel mesh critter guards around the entire outer perimeter of your array keeps wildlife out.
Critter guards snap securely onto panel frames without drilling, preserving your manufacturer equipment warranty while protecting your wiring. This physical steel barrier runs continuously around the lower edge of the panels, sealing off the gap between the roof shingles and the solar array.
Optimizing Battery Storage Integration and Load Calculations
Adding energy storage batteries gives you backup power during grid outages, but incorrect battery integration can drain your wallet quickly. Before purchasing expensive lithium batteries, you must accurately calculate your home's true daily baseload.
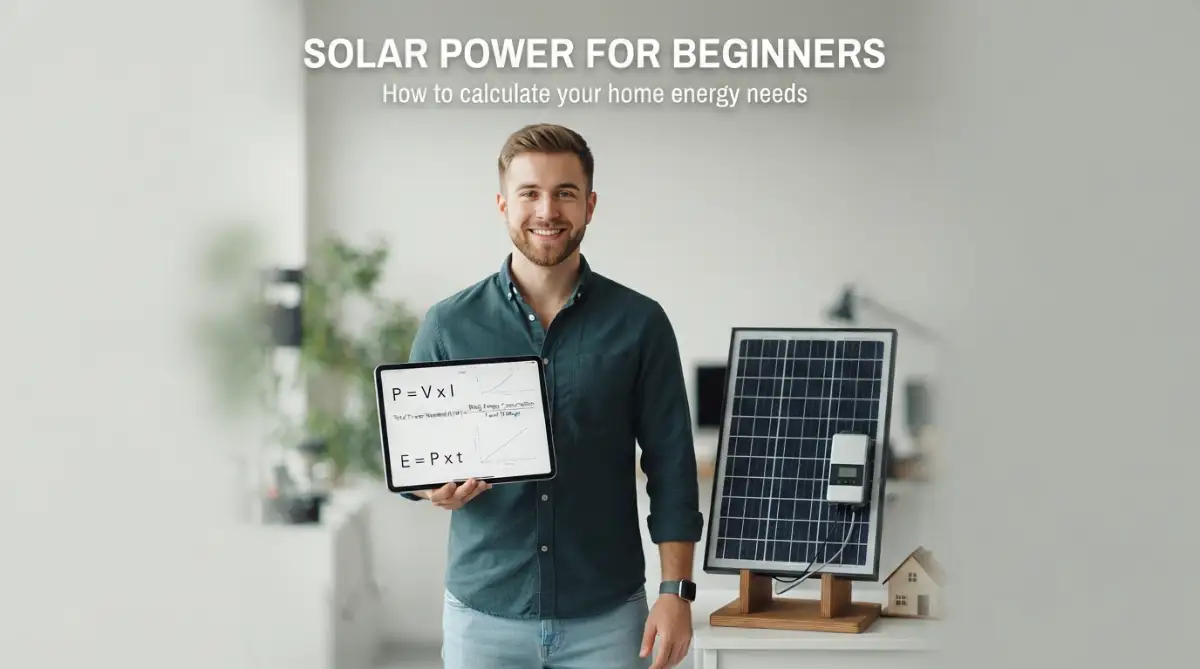
Using a comprehensive guide on how to calculate home solar panel requirements easily helps you determine exact battery storage capacities without overspending.
If your battery bank is too small, running heavy loads like central air conditioners will drain the cells in just a few hours. If your battery bank is too large, your solar panels may struggle to fully recharge the system during short winter days.
Balancing your battery capacity with your daily solar generation profile ensures your home stays powered through unexpected storm blackouts.
Establishing a Safe Cleaning and Maintenance Schedule
Dust, pollen, bird droppings, and industrial soot build up on panel glass over time, creating a physical barrier against sunlight. In dry climates, dirty panels can lose fifteen to twenty percent of their daily energy production.
However, cleaning panels incorrectly is a leading cause of permanent glass scratching and seal damage. Using harsh chemical cleaners or abrasive brushes strips away the anti-reflective coating applied at the factory.
Learning how to clean solar panels safely without scratching them keeps your glass spotless while protecting sensitive surface coatings. Always wash panels early in the morning when the glass is cool to prevent thermal shock cracking caused by cold water.
Proper maintenance combined with sound personal financial planning ensures your home improvements deliver reliable financial returns for decades.

Catastrophic Pitfalls That Can Destroy Your Solar Investment
While going solar offers incredible long-term rewards, stepping into common industry traps can turn your home improvement project into a complete nightmare. Thousands of homeowners fall victim to predatory sales tactics, cut-rate installation practices, and hidden legal traps every single year.
Understanding these dangerous pitfalls allows you to spot warning signs before signing a binding contract or allowing workers onto your roof.
Let us analyze the most destructive mistakes that can ruin your financial savings and compromise your family's safety.
Falling for Unrealistic Zero-Dollar Upfront Door-to-Door Leases
One of the most widespread industry traps involves high-pressure sales representatives offering supposedly free solar panel systems. These door-to-door salespeople use confusing language to sell long-term power purchase agreements or solar leases.
While these contracts require no money down, they often include aggressive annual price escalators that increase your monthly payment every year. Over twenty years, a bad solar lease can end up costing twice as much as purchasing a system outright.
In addition, selling a home with a solar lease attached is notoriously difficult because home buyers rarely want to assume someone else's monthly contract.
The consumer protection guidelines from the Solar Energy Industries Association warn homeowners to read every lease agreement line by line before agreeing to long-term financing terms. Depending on your budget and local incentives, owning a system may provide better long-term value for many homeowners than certain lease agreements.
The Danger of Mismatched Electrical Connectors and Knockoffs
High-voltage solar cables connect together using specialized weather-resistant plugs known as MC4 connectors. A subtle but severe mistake made by budget installers is cross-mating genuine MC4 plugs with cheap, unbranded knockoff connectors.
While different connector brands might physically snap together, their internal metal pins have slightly different manufacturing tolerances. This imperfect physical fit creates electrical resistance, leading to extreme localized heating over time.
Mismatched solar connectors are one of the leading causes of rooftop electrical arc fires in residential installations. The progression of this hidden hazard usually follows a dangerous pattern:
- Step 1: Genuine brand connectors are plugged into unbranded knockoff connectors.
- Step 2: Imperfect internal pin alignment creates micro-gaps and electrical resistance.
- Step 3: High current creates extreme localized heat buildup inside the plastic casing.
- Step 4: The plastic housing melts, creating open electrical arcs and rooftop fire risks.
Insist that your contractor uses identical, name-brand connectors across every single wire connection on your roof.
Skipping Grounding Safeguards and Surge Protection
Rooftop solar arrays act as giant metal lightning rods sitting at the highest point of your home. Failing to properly ground the aluminum racking system exposes your home to catastrophic lightning strikes and power surges.
A proper installation ties every single metal rail to a heavy copper grounding wire that runs directly down to a dedicated ground rod driven deep into the earth. Additionally, installing a whole-home surge protector at your main electrical panel guards your delicate inverter electronics from sudden grid spikes.
Without proper grounding, a nearby lightning strike can instantly fry your inverter, your household appliances, and your home entertainment systems.
The safety advisories at the Electrical Safety Foundation highlight proper electrical grounding as a fundamental defense against home structural damage.
Voiding Existing Roof Warranties with Non-Certified Installers
Most asphalt shingle and metal roof manufacturers offer twenty-to-thirty-year structural warranties on their products. However, these warranties contain strict clauses stating that unauthorized roof modifications will instantly void your coverage.
If an uncertified solar crew drills into your roof without following the shingle manufacturer's approved attachment guidelines, you lose your roof warranty completely.
If a storm causes a leak five years later, the roofing manufacturer will refuse to cover repairs, leaving you responsible for thousands of dollars in water damage costs.
Before work begins, verify that your solar installer holds active certifications from both the roof manufacturer and recognized industry bodies.
Managing your home energy strategy requires clear financial oversight, and exploring smart tools at financeinfoin.com helps you keep your home improvement budget balanced.
Your Action Plan for a Safe and Profitable Solar Home
Transitioning your home to clean rooftop power should be an exciting and rewarding journey. By educating yourself on common installation errors, you take complete control over your home's energy future.
Avoiding shortcuts in hardware selection, roof attachments, and wire sizing ensures your system operates safely through every winter storm and summer heatwave. Working with transparent, certified professionals protects both your home roof structure and your family budget.
Your Final Pre-Installation Checklist
- Verify your roof age and replace old shingles before installing mounting brackets.
- Demand aluminum roof flashing plates instead of temporary chemical sealants.
- Ensure your inverter choice matches your roof's shade profile and angle variations.
- Confirm that your installer secures all local municipal permits and utility interconnection approvals.
- Review twelve full months of utility bills to size your system accurately.
- Insist on critter guards to protect under-panel wiring from wildlife damage.
My own journey through roof leaks and bad wiring taught me that knowledge is your absolute best shield when upgrading your home. Once I fixed those early mechanical errors, my rooftop system became a completely reliable source of clean energy and daily savings. Take time to review your contract details today, and build a rooftop power system that serves your family safely for decades to come.
5 Quick Tips to Avoid Costly Solar Panel Installation Mistakes
1. Choose the Right Roof Location
Install solar panels on a roof that receives plenty of direct sunlight throughout the day. Avoid areas blocked by trees, chimneys, or nearby buildings, as even partial shade can reduce energy production.
2. Verify Your Roof's Condition First
Inspect and repair your roof before installation if needed. Installing solar panels on an aging or damaged roof may lead to expensive repairs or require the entire system to be removed later.
3. Select the Correct System Size
Do not assume that a larger solar system is always better. Match the system size to your household's energy usage to avoid overspending or generating less power than you need.
4. Use Quality Mounting and Wiring Materials
High-quality mounting hardware and properly installed wiring help protect your system from leaks, corrosion, and electrical issues. A well-installed system is more likely to perform reliably for many years.
5. Follow Local Building Codes and Manufacturer Guidelines
Make sure the installation complies with local regulations and the manufacturer's recommendations. Proper installation improves safety, supports system performance, and helps maintain warranty coverage where applicable.
Common Questions About Home Solar Installations
Can installing solar panels damage my existing roof shingles?
When performed by certified professionals using proper metal flashing, solar installations will not harm your roof structure. Damage usually occurs when budget installers drill directly through shingles without installing waterproof flashing plates underneath.
What happens to rooftop solar panels during a severe hail storm?
High-quality solar panels are built with tempered glass tested to withstand golf-ball-sized hail hitting at high speeds. Data from the National Renewable Energy Laboratory shows that panel glass damage from standard hail storms is remarkably rare.
How do I know if my solar installer is properly licensed?
Always ask your contractor for their state electrical license number and proof of active general liability insurance. You can easily verify their licensing status through your local state licensing board website.
Is it safe to clean my solar panels with a pressure washer?
Never use a high-pressure washer on your solar panels because the extreme pressure can shatter the glass or break water seals. Stick to a soft garden hose, a gentle sponge, and mild soapy water early in the morning.
Why is my solar power output lower than the advertised system size?
Advertised system ratings represent ideal laboratory conditions that rarely exist in the real world. Natural factors like ambient heat, wire resistance, inverter conversion losses, and slight panel dust lower real-world output by ten to fifteen percent.
Do I need to upgrade my main electrical panel before adding solar?
If your home has an older electrical panel rated at 100 amps or less, you may need an upgrade to handle the additional incoming solar breaker. A licensed electrician can evaluate your main panel capacity during the initial site assessment.
How can I tell if my solar inverter is working properly?
Modern inverters feature external LED indicator lights and built-in Wi-Fi monitoring that sends daily production reports directly to your smartphone. Green lights indicate normal operation, while red or yellow lights signal grid errors or internal system faults.
Disclaimer: This article is for informational and educational purposes only. It does not constitute professional engineering, electrical, roofing, or financial advice. Building codes, electrical standards, and solar incentive programs vary significantly by region and utility provider. Always consult a licensed electrical contractor, certified structural engineer, and qualified financial advisor before installing energy equipment on your home.