
The Frustration of Getting the Wrong AI Image
I still remember trying to create a simple image for a project presentation. I pictured a professional business meeting in a bright, modern office, but the AI generated something completely different. The people looked unrealistic, the hands were distorted, and the final image was nowhere close to what I had imagined.
After several attempts, I realized the problem was not the AI tool itself. I simply wasn't giving it clear enough instructions. Like many beginners, I assumed a short description would be enough, but AI image generators rely on detailed prompts to understand exactly what you want.
If you have ever struggled to create realistic AI images or wondered why your results look inconsistent, you are not alone. The good news is that writing better prompts is a skill anyone can learn. Once you understand how AI interprets your instructions, you can create clearer, more professional-looking images with far less trial and error.
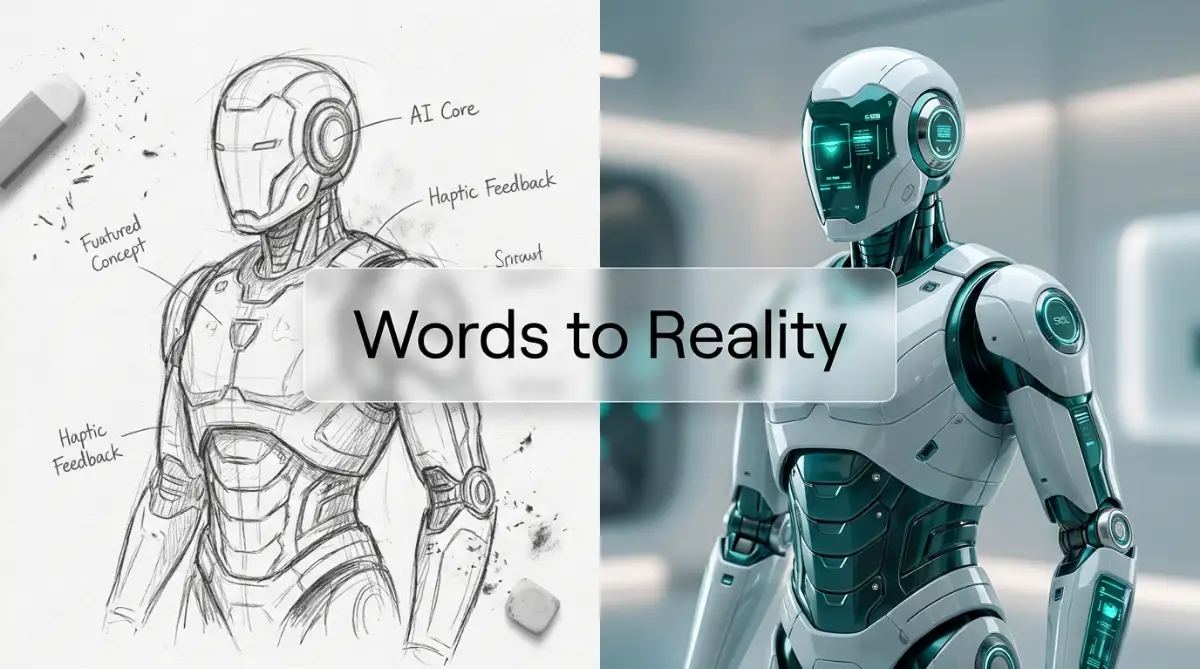
How AI Image Generators Understand Your Prompts
To fix this communication gap, we first need to understand how these intelligent systems actually read our words. They do not think like human beings.
If you tell a human artist to draw a "cool car," the artist will use their imagination to add shiny paint, nice wheels, and a beautiful background. The AI image generator does not have a natural imagination.
AI image generators analyze the words in your prompt to understand the subject, style, lighting, composition, and other visual details before creating an image.
If you do not give it enough descriptive words, it simply guesses. And most of the time, its wild guesses look terrible.
You must act like a very strict movie director. You have to tell the system exactly what is happening, where it is happening, and how the light looks.
This brings us to the very foundation of getting high-quality results. We need a clear, structured way to speak to the AI model.
The Core Subject and Action Formula
The absolute foundation of a great result is defining the main subject clearly. You cannot just use vague terms and hope for the best.
Instead of typing "a dog," you need to be highly specific. What kind of dog? What is the dog doing?
A much better approach is typing "a golden retriever running happily." Now, the machine has a specific breed and a specific action to work with.
You should always start your sentence with the most important element. These intelligent systems give much more weight to the words at the very beginning of your sentence.
If your main focus is a wooden cabin, do not put "wooden cabin" at the end of a long paragraph. Put it right at the front.
Pro Tip: Early in my journey, I used to write massive paragraphs explaining the deep emotional meaning behind my picture. I quickly realized that AI does not care about deep poetry; it only cares about clear, visual keywords placed right at the beginning of the text.
This simple adjustment immediately changed my results. Keep your main subject front and center.
Setting the Perfect Environment
Once your main subject is clear, you need to build the world around them. A subject floating in an empty white space is rarely interesting.
Think about the environment as the stage for your actor. Where exactly is this happening?
Instead of saying "in a city," describe the specific type of city. You can say "a rainy cyberpunk street at midnight" or "a bright sunny park with tall oak trees."
Adding environmental details grounds your subject in reality. It gives the AI modelcontext clues to help it generate better shadows and reflections.
For example, if you mention a rainy street, the system automatically knows it needs to add wet reflections on the ground. This instantly makes your final picture look highly realistic.
Always try to include the time of day and the general weather condition. These small details completely change the mood of your digital creation.
Mastering the Power of Lighting Words
Lighting is the single most powerful element that separates amateur pictures from professional ones. Bad lighting makes everything look flat and boring.
You need to explicitly tell the system how to light your scene. You can use terms like cinematic lighting, volumetric lighting, or soft studio light.
If you want a moody, dramatic feel, you should ask for "harsh shadows" or "low key lighting." If you want a bright, happy commercial look, ask for "bright ambient lighting" and "pure white background."
Let us look at a practical scenario. Imagine you want a picture of a coffee cup.
Prompt A: "A cup of coffee on a table." This will look completely ordinary.
Prompt B: "A cup of coffee on a wooden table, warm morning sunlight shining through a window, soft glowing steam, cinematic lighting."
Prompt B is much more likely to produce a polished and professional-looking image.
Directing the Virtual Camera
Many people forget that they can actually control the camera angles inside the machine's brain. You do not have to accept the default straight-on view every time.
Think about how professional photographers work. They get down low, they shoot from above, they use different lenses.
You can type words like extreme close-up, wide angle shot, or drone view to completely change the perspective. This adds massive visual interest to your work.
If you want an epic, powerful look, use a "low angle shot." This makes the subject look tall and dominant.
If you want to show a large crowd or a huge building, use a "bird's eye view." This forces the system to zoom out and show the bigger picture.
You can even mention specific camera lenses. Typing "50mm lens" or "macro photography" tells the system exactly how much background blur to apply.
Are You Enjoying These Techniques So Far?
Check out this amazing video breakdown where an expert visually demonstrates how changing just one word completely transforms the final output. It is highly recommended to watch this before trying your next project!
Exploring Different Artistic Styles
You are not just limited to realistic photos. The AI tool knows millions of different art styles, but you have to ask for them specifically.
If you want a painting, do not just say "a painting." Say "an oil painting in the style of the Renaissance."
If you want a digital illustration, use keywords like "vector art," "flat design," or "concept art." These specific terms trigger completely different memory blocks inside the system.
You can even blend styles together for unique results. For example, "a futuristic spaceship drawn in a vintage watercolor style."
Mixing contrasting ideas forces the AI model to create something truly original. This is where your personal creativity really shines through the technology.
Always remember to include words that define the overall quality. Words like highly detailed, 4k resolution, or masterpiece actually help push the system to render better textures.
The Secret Weapon: Telling It What To Ignore
Sometimes, getting a great result is not about what you include. It is about what you specifically exclude.
Many systems allow you to use a negative command line. This is where you list everything you absolutely do not want to see in your final picture.
If you are generating a portrait and you hate how the hands look, you can add "ugly hands, deformed fingers, extra limbs" to your negative list.
If you want a perfectly clean, modern room, you might add "clutter, mess, dirty, vintage" to the negative area.
This acts as a safety net. It strictly forbids the AI tool from guessing in the wrong direction.
Using strong negative instructions instantly cleans up the final image. It removes the weird, random artifacts that make digital art look completely fake.
The Art of Continuous Iteration
You must understand a very simple reality about this process. You will almost never get the perfect picture on your very first try.
This technology requires patience and continuous tweaking. We call this the iteration process.
You start with your base idea. You look at what the platform gives you. Then, you adjust your words based on that result.
If the picture is too dark, you go back and add "bright lighting." If the subject looks too cartoonish, you add "hyper-realistic photograph."
It is a constant conversation between you and the system. You take small steps, changing one or two words at a time.
If you change twenty words all at once, you will not know which word fixed the problem. Move slowly, observe the changes, and learn how the system reacts to your commands.
Structuring Your Master Formula
Let us bring all of these concepts together into a clean, repeatable formula that you can use every single day.
You can think of it as building a sandwich. You need your base layers, your main fillings, and your flavorful toppings.
Start with the Medium (is it a photo, a 3D render, or a painting?).
Next, add the Subject (who or what is the main focus?).
Then, describe the Environment (where is this taking place?).
Follow that with the Lighting (how is the scene illuminated?).
Finally, add the Camera Details and Resolution (what is the perspective and quality?).
So your final text might look like this:
"A hyper-realistic photograph of a smiling businessman typing on a laptop, sitting inside a modern glass office, bright morning sunlight shining through the window, shallow depth of field, 8k resolution."
When you structure your thoughts in this exact order, the AI tool processes the information perfectly. This structure helps AI interpret your prompt more accurately and consistently.
Common Mistakes to Avoid Today
Even with a great structure, many people fall into a few common traps. One major mistake is using contradictory words.
You cannot ask for "bright sunny day" and "dark gloomy shadows" in the exact same sentence. The system will get deeply confused and give you a messy gray picture.
Another big mistake is using abstract emotional words to describe physical objects. Saying "a sad chair" does not mean anything to a computer.
Instead of "sad chair," you should say "an old, broken wooden chair in a dark, empty room." Describe the visual elements that create the feeling of sadness.
Always focus on visual, physical descriptions. If you can clearly see it in your mind's eye, you can easily describe it with simple, direct English words.
Pushing the Boundaries of Imagination
Once you master these basic rules, you will realize that you have a limitless studio at your fingertips. You can become a photographer without a camera and a painter without a brush.
The initial frustration will completely disappear. You will no longer waste hours fighting with the system.
Instead, you will spend your time experimenting with wonderful new ideas. You will confidently create stunning visuals for your business, your social media, or your personal projects.
Remember, this is just a tool. It does not replace human creativity. It simply acts as a powerful bridge between your imagination and the digital screen.
By taking the time to learn this communication language, you are unlocking a massive advantage. You are taking full control of your creative process.
Keep practicing, keep adjusting your words, and keep building beautiful digital worlds. The power is entirely in your hands.
Taking Your Digital Art to the Next Level
Once you master the basic rules of speaking to the AI model, it is time to look at some professional techniques. These hidden methods are exactly what top creators use to produce mind-blowing visuals every single day.
You do not need to be a computer scientist to understand these advanced tricks. You just need to change the way you structure your commands.
Many people give up after getting a few decent pictures because they do not know how to push the system further. We are going to fix that right now by looking at some secret tools you already have.
The Magic of Word Weighting
Sometimes, the image generation system completely ignores a specific word you typed. You might ask for a red car, but the system gives you a blue one because it focused too heavily on the background colors.
To solve this, professional creators use a concept called word weighting. This simply means telling the system which specific words are the absolute most important in your sentence.
Different systems handle this differently, but many use simple brackets or parentheses. Putting a word inside brackets forces the image generation system to pay extra attention to it.
For example, typing "a (((red))) car on a busy street" tells the system that the color red is non-negotiable. If you want to dive deeper into how machine learning works step by step, you will see that mathematical weight is everything to these programs.
By pushing the attention exactly where you want it, you stop the image generation system from making random choices. You become the true director of the final image.
Controlling the Final Shape and Size
A beautiful picture becomes completely useless if it does not fit where you want to post it. Many beginners forget to tell the image generation system what shape the final picture should take.
By default, most systems give you a basic square. But a square looks terrible if you need a wide banner for your website or a tall picture for a mobile phone screen.
You must take control of the aspect ratio right from the beginning. You do this by adding simple size commands at the very end of your text block.
For instance, asking for a "16:9 ratio" gives you a wide, cinematic view perfectly suited for computer monitors. This requires an understanding of how rendering complex lighting structures fills up a wider canvas space.
If you are designing for mobile social media, ask for a "9:16 ratio" to get a tall, vertical shot. Setting the size early prevents awkward cropping later on.
Building Your Personal Idea Library
The most successful creators never type their commands from scratch every single time. That takes too long and opens the door for completely unnecessary typing mistakes.
Instead, they build a personal library of winning formulas. Whenever they get a perfectly lit scene or an amazing art style, they immediately save that exact text in a separate document.
You can easily use AI to automate repetitive daily tasks at work by reusing these proven text blocks. Think of it like saving your favorite cooking recipes in a secure notebook.
Next time you need a picture, you just copy your saved lighting and camera settings, and only change the main subject. This guarantees high-quality results in seconds instead of hours.
You can keep this library in a simple notebook app on your phone. Over time, this collection becomes your most valuable digital asset.
Keeping Characters Consistent Over Time
One of the biggest struggles people face is creating a character and then trying to put that same character in a different scene. Usually, the image generation system generates a completely different face every single time.
To fix this, you need to understand the concept of a Seed Number. Every single picture the platform creates has a unique hidden ID number attached to it.
When you find a face you really love, you can extract that specific seed number from the system settings. Then, you simply paste that exact number at the end of your next request.
This tells the machine to use the exact same starting point for its latest advancements in text-to-image systems. The character will suddenly look mostly identical, even if they are now wearing different clothes or standing in a different room.
It takes a little bit of practice to find these seed numbers, but it changes absolutely everything. You can finally create consistent storybooks, comic panels, or marketing campaigns.

The Hidden Traps Destroying Your Creations
Even with the best intentions, it is very easy to fall into bad habits. Many people unintentionally sabotage their own work because they misunderstand how the computer actually reads their text.
When you make these mistakes, you waste your daily limits, you burn through your budget, and you end up incredibly frustrated. Let us look at the absolute worst things you can do during this process.
Avoiding these common pitfalls will save you massive amounts of time and preserve your creative energy for the fun parts of the job.
The Danger of Prompt Overloading
The single most common mistake beginners make is writing an absolute essay. They think that adding more words will automatically make the picture better.
They will type things like "beautiful, amazing, stunning, gorgeous, best quality, super nice, extremely good looking." The platform does not understand human emotions or generic praise.
When you stuff your sentence with hundreds of useless filler words, you trigger prompt bloat. The system gets so confused by the extra noise that it completely forgets your main subject.
Instead of a sharp, clean image, you get a muddy, chaotic mess. If you look at principles of digital color grading, you will see that simplicity always produces cleaner visuals.
Keep your sentences short, punchy, and highly descriptive. Every single word must serve a very specific visual purpose.
Mixing Unrelated Artistic Styles
Another massive trap is asking the machine to do impossible combinations. You cannot ask for a "hyper-realistic photograph" and an "oil painting illustration" in the same breath.
When you blend completely opposing styles, the system panics. It tries to give you both at the same time, resulting in a plastic-looking nightmare.
The textures will look strange, the lighting will be broken, and the image will lack a clear identity. You must pick one specific lane and stay firmly in it.
If you want a photograph, use photography terms like shutter speed, camera lens, and studio lighting. If you want a painting, use art terms like brush strokes, canvas, and watercolor.
Never force the image generation system to guess which style you actually prefer. Be completely decisive about the final look you want to achieve.
Ignoring the Power of Simplicity
Many people assume that to get professional results, they need to use complicated technical jargon. They spend hours looking up obscure art terms they do not even understand.
The truth is, the most striking images often come from incredibly simple requests. When you use words you do not fully understand, you lose control of the final outcome.
Start with plain, everyday English. Once you have a clean base image, then you can slowly add one technical term at a time to see how it affects the result.
If you want to master this skill, you need a solid foundation in how these tools operate. I highly recommend visiting financeinfoin.com to explore more resources on navigating modern technology smoothly.
Never overcomplicate the process just to feel like an expert. The final picture is all that matters, not how complex your text looks.
Giving Up After the First Try
The final, and saddest mistake, is simply quitting too early. The very nature of this technology is unpredictable and slightly random.
The first image you generate will rarely be perfect. It might have a weird background, strange shadows, or a distorted face.
Amateurs see this bad result, throw their hands up in the air, and declare that the tool is useless. Professionals see a bad result and immediately start looking for exactly which word caused the problem.
They delete a word, add a new one, and hit the generate button again. This constant cycle of tweaking is where the real magic happens.
Patience is your absolute greatest weapon here. You are literally teaching a platform how to see your personal imagination, and that requires a little bit of grace.
Your Daily Action Plan for Stunning Visuals
You now have a powerful set of tools to completely transform the way you create digital art. It is no longer a guessing game of random words and broken pictures.
You understand the mechanics behind the platform, the importance of clear communication, and the hidden traps to avoid. All that is left now is to actually put this knowledge into daily practice.
Let us break down a very simple routine that you can start using right away. This will help you lock in these new skills permanently.
What You Should Do Tomorrow Morning
When you sit down at your computer tomorrow, do not just start typing randomly. Take exactly two minutes to visualize the final picture in your mind before touching the keyboard.
Write down your main subject, the environment, the lighting, and the camera angle on a physical piece of paper. This forces you to organize your thoughts clearly.
Once your plan is solid, open a blank text document and create your first formula. If the first image looks bad, do not panic and do not delete everything.
Change just one single word and try again. Watch carefully how that one small adjustment changes the shadows or the colors.
When you finally get an image that makes you smile, copy that entire text block and save it securely. You have just taken your first real step toward mastering this amazing technology.
A Quick Reminder on the Learning Curve
Every single expert you see posting flawless art online started exactly where you are today. They generated hundreds of terrible, ugly pictures before they figured out the right formulas.
Do not compare your day one to somebody else's year two. Give yourself the freedom to make silly mistakes and generate weird results just for fun.
The more you play around with different words, the faster your brain will understand the hidden patterns. Eventually, writing these commands will feel as natural as talking to a good friend.
My Final Thoughts on Your Journey: I spent countless nights staring at my screen, feeling totally defeated by this technology. But the day I finally created my very first perfect image, a massive wave of pride and joy washed over me. I know you will experience that exact same thrilling moment very soon, so keep pushing forward and let your creativity fly!
Ready to Create Better AI Images?
Writing effective Prompt engineering prompts is a skill that improves with practice. Start with clear descriptions, experiment with different styles, and refine your prompts one step at a time. Even small changes can make a noticeable difference in the final image.
If you found this guide helpful, explore more beginner-friendly AI tutorials and practical technology guides on FinanceInfoIn to build your skills and create better results with confidence.
Five Essential Tips for Writing Better AI Image Prompts
1. Be Clear and Specific
Avoid vague prompts like "a beautiful landscape." Instead, describe exactly what you want, including the subject, setting, lighting, colors, and mood. The more specific your prompt, the more accurate and consistent the AI-generated image will be.
2. Describe the Style and Composition
Tell the AI what artistic style or photography look you prefer. For example, include terms like photorealistic, watercolor, 3D render, cinematic, or digital painting. You can also specify camera angles, framing, and aspect ratios for better results.
3. Include Lighting and Background Details
Lighting dramatically affects image quality. Mention details such as golden hour lighting, soft natural light, studio lighting, or dramatic shadows. Pair this with a clear background description to create a polished, professional-looking image.
4. Add Quality and Technical Keywords
Improve image quality by including terms like high resolution, ultra-detailed, 8K, sharp focus, realistic textures, and professional photography. These keywords help AI generate cleaner, more visually appealing results.
5. Refine and Experiment
Your first prompt is rarely perfect. Adjust descriptions, remove unnecessary words, or add more details based on the generated image. Small prompt improvements often lead to significantly better AI image prompts over time.
Common Questions About Generating AI Pictures
Why do my AI images look fake and plastic?
This usually happens because you are not using strong environmental or lighting descriptions. Adding terms like soft natural lighting, film grain, or hyper-realistic textures instantly removes that shiny, plastic look.
Can I use these pictures for my business website?
Yes, most major platforms allow you to use the images you generate for commercial purposes. However, it is always a good idea to check the specific rules of the software you are using to stay totally safe.
How do I fix messy hands and extra fingers?
Machines struggle heavily with human hands. The best way to fix this is by adding strict negative commands like "deformed hands, extra fingers, blurry limbs" to force the system to render them correctly.
Should I write short or long sentences?
You should aim for the middle ground. Very short sentences lack necessary details, while massive paragraphs confuse the software entirely. Keep your descriptions clear, highly specific, and straight to the point.
Do I need a powerful computer to do this?
Not at all! All the heavy lifting is done by massive servers on the internet, not your actual AI model. As long as you have a stable internet connection and a basic web browser, you are completely good to go.
How can I keep the same face in different pictures?
You need to use a specific Seed Number from an image you already like. By attaching that exact number to your new requests, the system uses the same mathematical starting point for the character's face.
Is it possible to copy an exact real-life photograph?
While you cannot legally copy a copyrighted image directly, you can upload a reference photo to many of these tools. You then ask the software to use the overall style and composition of that photo to create something entirely brand new.
Disclaimer: The information provided in this article is for educational and informational purposes only. AI tools and platforms frequently update their features, rules, and algorithms. Always refer to the official documentation and terms of service of the specific AI software you choose to use. We are not responsible for any copyright issues or account restrictions you may face on third-party platforms.