The Frustrating Reality of a Broken Website Connection
The strange part was that nothing had changed on my site. I had not installed a new plugin, updated WordPress, or touched my hosting settings. Yet the website refused to load. For a moment, I thought I had lost my entire website. After taking a step back and checking a few key settings, I found the real cause and got everything working again.
Imagine waking up, grabbing your morning coffee, and opening your laptop to check your website. Instead of seeing your beautiful homepage, you are greeted by a blank gray screen showing a terrifying message.
It says your connection is not private, or worse, it shows the dreaded domain name system error. Your heart sinks into your stomach immediately.
This sudden roadblock stops your entire digital life in its tracks. You cannot write new posts, your customers cannot buy your products, and your daily traffic drops to zero.
It feels like your digital storefront has been locked perfectly tight, and you have lost the only key. The worst part is that you have done absolutely nothing wrong to cause this.
You try refreshing the page ten times, hoping it is just a temporary glitch. But that stubborn error message simply refuses to go away.
Why Common Advice Leaves You Feeling Lost
When you search for a solution online, you often find yourself drowning in a sea of confusing information. This makes a highly stressful situation even worse.
- Heavy Technical Jargon: Most tech blogs assume you are a professional server administrator. They use massive words and complex acronyms without explaining what they actually mean.
- Outdated Information: You might follow a guide step-by-step, only to realize your computer settings look completely different now. This wastes your time and energy.
- Dangerous Quick Fixes: Some forums suggest downloading random software to fix your connection issues automatically. This often leads to harmful malware infecting your personal computer.
- Lack of Clear Explanations: Writers tell you to type strange commands into your computer without explaining the "why" behind them. This leaves you feeling scared that you might break your computer completely.
The Hidden Toll on Your Mental Peace
A broken website does not just hurt your digital presence. It slowly eats away at your personal confidence and mental comfort.
- Constant Anxiety: You worry that your website might be permanently deleted or hacked. This fear sits in the back of your mind all day long.
- Imposter Syndrome: When you cannot fix a simple connection issue, you start doubting your abilities as a website owner. You feel like you are not smart enough to run an online business.
- Financial Stress: Every hour your site is down means potential lost revenue. For small business owners, this creates massive panic about paying upcoming bills.
- Loss of Trust: You fear that visitors will see the broken site and think your business is unprofessional. Rebuilding that lost trust takes a massive amount of hard work.
Understanding Why the Error Happens
Before we start clicking buttons and typing commands, let's first understand what is happening behind the scenes. This knowledge gives you the power to fix the problem confidently.
Think of the internet as a massive digital phonebook. When you type a website name into your browser, it does not actually know where that website lives.
Your browser has to ask a special system called the Domain Name System (DNS) to look up the correct address. The DNS finds a specific string of numbers, called an IP address, and connects you to the site.
The error message you are seeing simply means "Non-Existent Domain". Your browser checked the phonebook, but it could not find the numbers it needed to connect to your your website.
This usually happens because of a miscommunication on your own computer, not a problem with your website itself. Now that you understand the logic, let us walk through the exact steps to restore your connection.
Step 1: Clearing Out Your Confused Local Memory
Your computer is designed to be very fast and highly efficient. To save time, it naturally remembers the addresses of websites you visit frequently.
This saved memory is called a cache. However, sometimes this saved information becomes old, corrupted, or completely broken.
Imagine moving to a new house, but the local post office keeps sending mail to your old apartment. The mail will never reach you because the post office is relying on outdated records.
Your computer does the exact same thing with website addresses. The next step is to force your computer to forget the old addresses and request fresh DNS information.
Flushing the Cache on Windows:
If you are using a Windows computer, you will use a built-in tool called the Command Prompt. Click on your start menu and type the letters "cmd" into the search bar.
When you see the Command Prompt app appear, right-click on it and select "Run as administrator". This gives you the proper permission to make system changes.
A black window will pop up on your screen. Type the exact command ipconfig /flushdns and carefully hit the enter key.
You should see a friendly message saying the resolver cache was successfully flushed. You have just cleared out all the old, confused memory from your computer system.
Flushing the Cache on Mac:
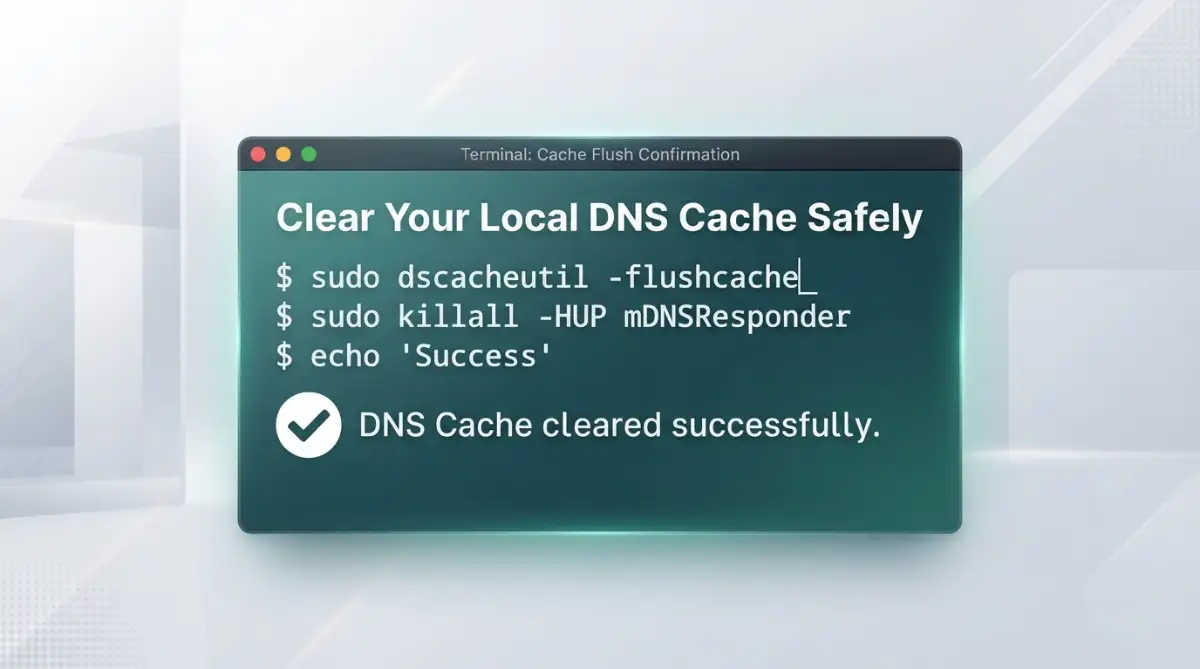
If you are an Apple user, the process is just as simple but uses a different tool. Open your spotlight search by pressing Command and the Spacebar together.
Type the word "Terminal" and hit enter to open the application. This is the Mac version of the command center.
In this window, type sudo dscacheutil -flushcache; sudo killall -HUP mDNSResponder and then hit enter. Your Mac will ask for your main computer password to verify it is really you.
Type your password slowly (the characters will not show up on screen) and press enter again. Your local memory is now completely clean and ready to work properly.
Step 2: Renewing Your Network Connection Completely
Sometimes clearing the memory is simply not enough to solve the problem. Your computer might be holding onto a faulty connection to your home internet router.
Every device on your home network is given a temporary identification ticket. If this ticket expires or gets messed up, your computer cannot speak to the internet properly.
Think of it like taking a numbered ticket at a busy bakery counter. If your ticket gets torn in half, the baker will not serve you.
You need to throw away the broken ticket and pull a brand new one from the machine. We are going to tell your computer to drop its current network ticket and request a fresh one.
Getting a Fresh Connection:
Open your Command Prompt on Windows again, making sure to run it as an administrator. First, release the current network connection by typing ipconfig /release.
Type ipconfig /release and strictly press the enter key. Your internet might drop completely for a few seconds, which is perfectly normal.
Now, we need to politely ask your router for a brand new ticket. Type the command ipconfig /renew and hit enter one more time.
Your computer will take a few moments to negotiate a fresh, clean connection with your network. Once this process finishes, you will see a list of new numbers appear on your screen.
The Hardware Restart Trick:
If typing commands feels intimidating, you can also solve this issue physically. Walk over to your home internet router and modem.
Unplug the power cables directly from the back of the devices. Do not just turn them off; physically remove the cables from the plastic ports.
Wait for a full 60 seconds before plugging them back in. This pause gives the internal hardware enough time to clear out any small electric charges and reset completely.
Once the lights on your router turn green again, your entire network will have a fresh start. This physical restart often fixes the communication errors quietly hiding in your home network.
If you are a visual learner and want to see exactly how to type these commands safely on your screen, watch this quick step-by-step video tutorial below. After watching, keep reading to discover a simple physical hardware trick that fixes what the computer commands cannot!
Step 3: Upgrading Your Default Navigation System
If clearing your memory and renewing your connection did not work, The next step is to check who is providing your DNS service. By default, your Internet Service Provider (ISP) acts as your digital phonebook.
Unfortunately, ISP servers are often slow, outdated, or easily overwhelmed by too much traffic. When their servers fail, you get hit with annoying domain errors.
We can easily fix this by changing your settings to use a premium, public navigation system. Companies like Google and Cloudflare offer massive, incredibly fast servers for absolutely free.
Switching to these public servers is like upgrading from an old, torn paper map to a modern GPS system. It ensures your browser always gets the fastest and most accurate directions to your website.
Changing Settings on Windows:
To make this upgrade, right-click on the internet icon in your bottom taskbar. Select "Open Network & Internet settings" from the small menu that appears.
Look for an option called "Change adapter options" and click on it gently. You will see a list of your current internet connections.
Right-click on your active connection (usually labeled Wi-Fi or Ethernet) and choose "Properties". A small box will appear with a list of technical items.
Scroll down until you find Internet Protocol Version 4 (TCP/IPv4). Click on it once to highlight it, and then press the Properties button just below the list.
Entering the New Server Numbers:
Near the bottom of the new window, select the circle that says "Use the following DNS server addresses". This allows you to type in custom numbers manually.
For the preferred server, type 8.8.8.8 into the blank boxes. For the alternate server, type 8.8.4.4 right below it.
These specific numbers belong to Google's public servers, which are highly reliable. Click the "OK" button to save your new settings, and then close all the windows.
Restart your browser completely and try visiting your website again. For many people, this simple upgrade instantly brings their broken website back to life.
When I first tried fixing this network issue, my biggest mistake was getting impatient and trying five different technical methods at the same time. I quickly realized that simply switching to Google's public servers and giving my laptop a full reboot solved the problem much faster than typing endless commands.
Advanced Network Secrets to Restore Your Connection Completely
If you have cleared your computer memory and upgraded your public servers, you are already ahead of most people. However, sometimes the domain name system error hides much deeper inside your machine.
To completely master this technical issue, the next step is at a few hidden settings that control your network. Understanding these deeper layers requires learning a bit more about the Domain Name System, which acts as the ultimate phonebook for the entire internet.
When you learn how this architecture works, you stop guessing and start fixing problems like a true professional. As we often see when exploring why bootstrapped startups collapse early and need cash flow fixes, technical downtime directly harms your daily revenue. You cannot afford to leave your digital storefront broken for days.
If you are using a Windows computer, checking official network troubleshooting guides often reveals hidden conflicts caused by recent software updates. Much like taking easy security steps to secure your crypto wallet, maintaining a clean network environment protects your online business from sudden lockouts.
The following methods can help resolve more advanced DNS issues.
Step 4: Inspecting Your Hidden Local Hosts File
Your computer has a highly secret document buried deep inside its system files called the "hosts file". This specific file acts as a strict VIP guest list for your web browser.
Long before your computer asks the public internet for directions to a website, it checks this local document first. If your website address is written in this file with the wrong numbers, your browser will never connect.
Think of it like saving a friend's phone number incorrectly in your personal contacts app. Even if the global phone directory has their correct number, your phone will always call the wrong person because it trusts your personal list first.
Sometimes, security software, previous website migrations, or accidental clicks can add bad directions to this file. Start by opening this hidden document and checking whether your website is listed there.
Finding the File on Windows:
To check this VIP list on a Windows machine, you need special permission. Open your start menu, search for the "Notepad" application, right-click on it, and strictly select "Run as administrator".
Once Notepad opens, click on File, then select Open from the top menu. You need to navigate to a very specific folder path on your main hard drive.
Go exactly to C:\Windows\System32\drivers\etc using the top search bar. At first, the folder might look completely empty, which is a normal security feature.
In the bottom right corner of the open window, change the dropdown menu from "Text Documents" to "All Files". You will suddenly see a file simply named "hosts" appear on your screen.
Cleaning Up the VIP List:
Double-click the hosts file to open it in your Notepad window. You will see a lot of text with a "#" symbol at the beginning of each line.
These symbols mean the text is just a helpful comment, not a real computer rule. Scroll down to the very bottom of the document and look for your specific website name.
If you see your domain name listed next to a string of random numbers, carefully highlight that entire line and delete it. Do not touch anything else in the document.
Click File, select Save, and then close the Notepad application completely. You have just removed the bad directions, allowing your browser to finally ask the global internet for the right path.
Step 5: Pausing Your Private Security Tunnels
Virtual Private Networks (VPNs) and heavy antivirus programs are excellent tools for your daily privacy. However, they are also a leading cause of sudden connection errors.
A VPN creates a completely private, encrypted tunnel between your computer and the internet. If this secure tunnel experiences a sudden glitch, it blocks all internet traffic completely.
Imagine driving on a massive underground highway to get to your favorite store. If the tunnel entrance suddenly collapses, you are completely stuck, even though the store above ground is perfectly open.
Your browser gets confused by this collapsed tunnel and throws the domain error message onto your screen. We need to test if your security software is accidentally acting as a roadblock.
Testing the Security Conflict:
Open your VPN application and temporarily turn off the secure connection. Do the exact same thing for any heavy antivirus software running in your background.
Once both are completely disabled, open a brand new private browsing window (Incognito mode). Try typing your website address into the top bar again.
If your website loads perfectly fast and looks beautiful, you have successfully found the true culprit. Your computer and internet are perfectly fine; the security software was simply blocking the path.
To permanently fix this, you will need to go into your VPN settings and clear its internal cache. Sometimes, completely uninstalling the VPN and downloading a fresh copy resolves the internal routing bug.
Step 6: Verifying Your Domain Name Registration
If you have tried every single computer trick and the error still appears, the problem might not be your machine at all. The next step is to check your domain registrar account.
Every website name requires a yearly rental fee paid to a domain registrar. If this yearly payment fails because your credit card expired, your domain gets locked immediately.
Think of this like leasing a beautiful apartment in the city. If you forget to pay your monthly rent, the landlord quickly changes the locks on your front door.
When visitors try to enter, they are turned away completely because the address is no longer technically yours. We need to make sure your digital rent is paid and your account is active.
Checking Your Registrar Account:
Log into your domain registrar account (like Namecheap, GoDaddy, or Bluehost). Look for a specific dashboard labeled "Domain Management" or "Billing".
Check the expiration date clearly listed next to your specific website name. If the status says "Expired" or "Suspended", you need to update your payment method immediately to restore the connection.
If the domain is perfectly active, look for a button labeled "DNS Settings" or "Nameservers". You need to ensure these settings are pointing directly to your current hosting provider.
If these nameserver settings are completely blank or point to an old hosting company, your website will never load. Reconnecting these numbers correctly is like giving the internet the exact GPS coordinates to your server.

Huge Roadblocks to Watch Out For
Troubleshooting your own website issues can feel incredibly empowering. However, it is very easy to make things worse if you start clicking buttons without a clear plan.
Just like you would look for the major warning signs to spot in a home inspection, you need to recognize the warning signs of bad technical advice. Avoiding these specific errors will save you from massive headaches and expensive repair bills down the road.
Let us review the most damaging mistakes people make when trying to force their website to load.
1. Modifying Core Website Files Blindly
When frustration hits, many beginners log into their web hosting panel and start changing core WordPress files. They open documents like the "wp-config.php" or ".htaccess" file hoping to find a quick fix.
This is incredibly dangerous because a single misplaced comma can destroy your entire website instantly. The domain error you are seeing is almost always a network issue, not a website coding problem.
Never alter your core PHP documents when dealing with basic browser connection errors. You are essentially trying to fix a broken driveway by tearing apart the foundation of your house.
2. Ignoring the Simple Browser Cache
People often spend hours typing complex computer commands while completely ignoring their web browser. Programs like Google Chrome or Safari save highly detailed copies of websites to load them faster next time.
If your browser saved a copy of the error page itself, it will keep showing you that error, even if the actual problem is fixed. You could have a perfectly working network, but your browser is just repeating old news.
Always clear your web browser data, history, and cookies before assuming the technical repair failed. A simple browser reset is often the final key to seeing your beautiful website again.
3. Playing with Custom Nameservers Unnecessarily
Your domain nameservers are the exact coordinates that link your website name to your physical hosting server. Many outdated forums tell frustrated users to change these coordinates to public numbers like Google's 8.8.8.8.
This is a massive misunderstanding of how website hosting actually works. Public servers are for your personal computer's network settings, never for your actual domain registrar dashboard.
If you put those public numbers into your domain account, your entire website will disconnect from its server completely. Always leave your registrar nameservers pointed precisely at your current hosting provider.
4. Leaving Your Firewalls Turned Off
Earlier, we discussed temporarily turning off your antivirus to test for a blocked connection. The keyword in that specific step is "temporarily".
Many people turn off their security, see their website load, and just leave the protection disabled forever. This leaves your personal computer highly vulnerable to malware, hackers, and dangerous tracking scripts.
If your security software is causing the conflict, you need to add your website to its "Safe List" or "Exceptions List". Never sacrifice your overall digital safety just to make one single webpage load faster.
5. Assuming the Problem is Global
When you see a connection error, it is natural to panic and assume your website is completely deleted. You might rush to social media and post an apology to your customers about the downtime.
In reality, the website might be working perfectly fine for every single person in the world except you. Your specific home internet router might just be having a bad day communicating with the outside world.
Before you panic, always check your website on your mobile phone using a cellular data connection instead of home Wi-Fi. This simple test quickly proves whether the issue is a global server crash or just a local home network glitch.
Taking Control of Your Digital Property Today
Facing a broken website connection can feel like standing in front of a locked door with no key. The confusing technical language and scary warning screens are designed to keep everyday people away from system settings.
However, you now have the exact blueprint to bypass these digital roadblocks safely and securely. You understand how your computer memory works, how to upgrade your navigation system, and how to spot bad advice instantly.
The next time you see the domain name system error, you will not feel panic or frustration. You will simply open your command prompt, clear the local memory, and restore your digital connection in a matter of seconds.
Taking control of your network settings builds incredible confidence in your ability to manage an online business. Keep these simple steps handy, trust your new knowledge, and get back to growing your beautiful digital storefront today.
Getting locked out of your own site is incredibly stressful, but fixing it yourself for the first time is a highly rewarding feeling. Once you understand the causes of DNS errors, resolving them becomes much easier. A systematic approach can fix most connection issues without risking your website or computer.
Final Thoughts
- Do not panic when you see the error. In many cases, the problem is caused by a small configuration issue rather than a lost website or deleted files.
- Create a full backup before making changes. Saving your website files and database gives you a safe way to restore everything if something goes wrong.
- Check one possible cause at a time. Testing each fix separately makes it much easier to identify what is actually triggering the error.
- Document every change you make. Writing down each step allows you to reverse changes quickly if the error becomes worse instead of better.
Frequently Asked Questions
If you are seeing the DNS_PROBE_FINISHED_NXDOMAIN error for the first time, these answers can help you understand the problem and fix it more confidently.
1. What does the DNS_PROBE_FINISHED_NXDOMAIN error mean?
This error means your browser could not find the IP address linked to the domain name you entered. It usually happens when DNS settings are incorrect, the domain is unavailable, or your computer cannot communicate with a DNS server properly.
2. Can I fix the DNS_PROBE_FINISHED_NXDOMAIN error myself?
Yes. In many cases, you can resolve the issue by flushing your DNS cache, restarting your router, renewing your IP address, changing your DNS server, or checking your domain's DNS configuration.
3. Does flushing the DNS cache delete any website files or personal data?
No. Flushing the DNS cache only removes outdated DNS records stored on your computer. It does not delete your website, personal files, passwords, or browser bookmarks.
4. Which DNS server is best for resolving this error?
Reliable public DNS services such as Google Public DNS (8.8.8.8 and 8.8.4.4) or Cloudflare DNS (1.1.1.1 and 1.0.0.1) are often faster and more dependable than many default ISP DNS servers.
5. What should I do if the error still appears after trying all the fixes?
If the problem continues, check whether your domain registration is active, verify your DNS records and nameservers, contact your hosting provider, or ask your domain registrar to investigate any DNS-related issues. They can confirm whether the problem is with your local network or the domain itself.
Disclaimer: The information provided in this article is for educational and troubleshooting purposes only. Modifying computer network settings or domain configurations carries inherent risks. Always ensure you have administrative access and fully understand the commands before applying changes to your system. We are not responsible for any accidental data loss, network outages, or hosting issues that may occur. If you are unsure about your registrar settings, please contact your official hosting provider for direct technical support.