The Silent Panic of a Dead Battery That Thinks It’s Alive
You plug your phone into the wall before going to bed. You see the glowing green bolt on your screen. You wake up only to find your phone is still stuck at three percent.
This sudden realization sends a cold wave of worry through your chest. You need your device for work, family, and daily errands. Now, you are stuck at home with a useless brick of glass and metal.
This common headache is called false charging. It makes you feel disconnected and helpless in a matter of minutes.
Why Finding a Real Solution Feels So Hard
- The Trap of Bad Online Hacks: The internet is filled with dangerous tips like putting your phone in the freezer. Others tell you to scrape the charging port with a sharp metal needle, which can permanently break the internal pins.
- Buying Unnecessary Accessories: Many people rush to the store to buy expensive new chargers or blocks. They waste their hard-earned money without checking if the issue is actually in the phone software.
- Downloading Scam Apps: Fake battery saver apps claim to fix hardware errors with a single click. In reality, these apps only drain more power and flood your screen with annoying ads.
How False Charging Ruins Your Daily Peace
- Constant Anxiety and Stress: You spend your entire day staring at the screen, hoping the battery bar moves up. Every text message or call feels like a luxury you cannot afford.
- Lost Trust in Your Device: You can no longer rely on your phone for morning alarms or navigation. This uncertainty ruins your confidence during important work meetings or travels.
- Fear of High Repair Bills: You worry that your phone battery is dead for good. The fear of paying hundreds of dollars at a repair shop keeps you stressed.
During my years working with mobile hardware, I have met countless people with this exact problem. Most of them thought their device was broken forever. In almost every case, a simple, logical check solved the issue without spending a dime.
The Hidden Mechanics Behind Your Charging Screen
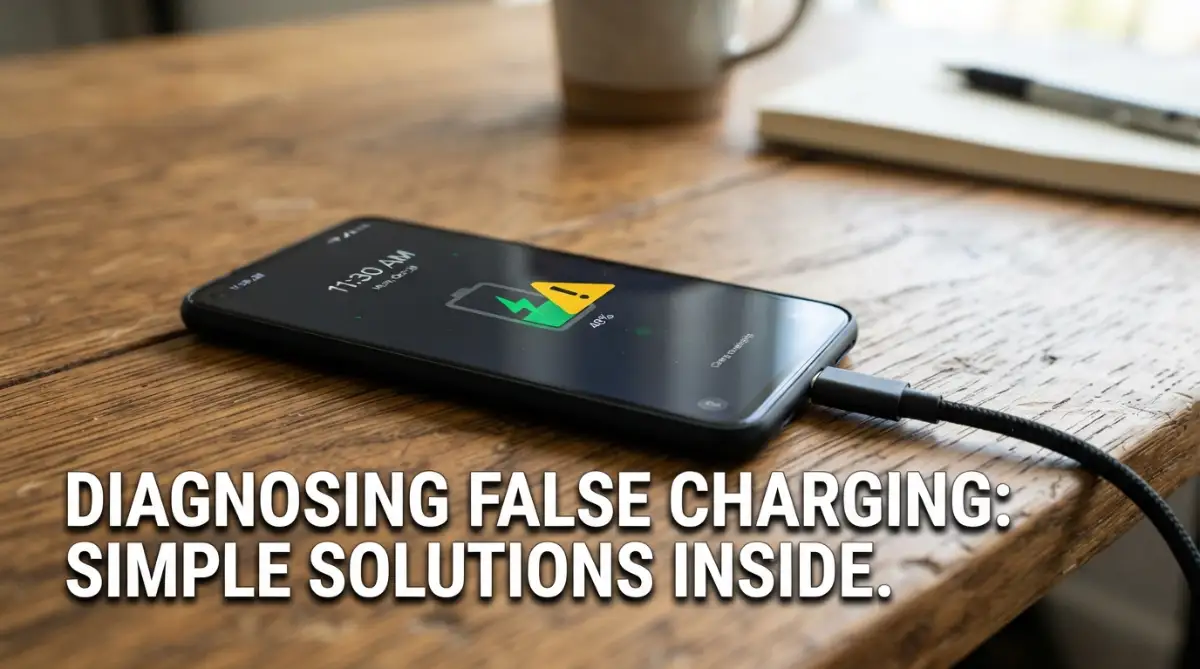
Before we try to fix the issue, let us understand why this happens. Your phone has a small computer chip inside that monitors the incoming power flow.
Sometimes, a breakdown in communication occurs between this chip, the battery, and your charging cable. When this happens, your screen shows a charging symbol, but the actual power never reaches the lithium cells.
This is not a sign of a dead phone. It is simply a misunderstanding between the hardware and software inside your device.
Step 1: Check and Clean the Charging Port with Safety
The most common reason for false charging is dirty ports. We carry our phones in tight pockets and bags all day long.
Over time, small pieces of lint, dust, and fabric get pushed deep inside the charging port. When you plug in your cable, this layer of dirt acts like a wall.
The metal pins cannot make a proper connection. The phone thinks it is connected, but it cannot draw real power.
The Toothpick Method for Safe Cleaning
To clean the port safely, you must never use anything metal like safety pins or paperclips. Metal can short-circuit the connection or bend the gold pins.
Instead, grab a simple wooden toothpick or a plastic dental pick. Gently insert it into the port and scrape the bottom with light pressure.
You will be surprised by how much grey lint comes out of that tiny hole. Try blowing gently into the port afterward to clear any remaining loose dust particles.
A Quick Analogy: The Blocked Keyhole
Think of your charging port like a keyhole to your front door. If there is gum or mud stuck inside, your key might fit, but you cannot turn the lock.
Cleaning the port is simply clearing out that mud. Once it is clean, your charger can sit snugly and deliver power without interruptions.
Step 2: Test the Integrity of Your Charging Cable and Adapter
Not all charging cables are built to last. The thin copper wires inside your USB cord bend and twist every time you use them.
Over time, these internal wires break, even if the outer plastic looks perfectly fine. This drop in wire quality prevents the necessary amount of power from traveling to your device.
The Couch Stretch Mistake
Do you use your phone while it is plugged into a wall outlet near your couch? Stretching the cord to its limit bends the neck of the cable at a sharp angle.
This constant pulling breaks the delicate shielding inside the wire. Your phone detects a connection, but the weak wire cannot carry enough current to charge the battery.
If you suspect this is happening, try swapping your current cable with a known working one. Borrow a cable from a family member to see if the battery starts climbing.
How to Check Your Power Block
Sometimes, the problem lies in the wall adapter rather than the cable. Try plugging your USB cable into a different wall block.
Avoid using your laptop USB port to test this problem. Computer USB ports deliver very low power, which can make false charging issues look much worse.
Always test your cable with a high-quality wall outlet to ensure a steady flow of electrical current.
Step 3: Force Restart and Reset the Charging Software
Your smartphone is basically a tiny computer. Like any computer, its software can experience glitches and temporary freezes.
The software that controls your battery level can get stuck. It might keep displaying the charging animation even when the hardware has stopped pulling power.
How to Perform a Force Restart
A regular restart might not be enough to clear deep software bugs. You need to perform a force restart or a soft reset.
On most Android devices, press and hold the Power Button and Volume Down Button at the same time for ten seconds. Your screen will go black, and the device will reboot.
On an iPhone, press and release Volume Up, press and release Volume Down, then hold the Power Button until the Apple logo appears. This process cuts off power to the screen and memory temporarily. It forces the system to boot up fresh and read the true battery percentage.
The Software Calibration Process
If the force restart works, your battery percentage might jump suddenly from three percent to fifty percent. This shows that your software was simply misreading the battery level.
To keep this from happening again, let your phone drain completely to zero percent once in a while. Then, charge it to one hundred percent without unplugging it to reset the battery sensor.
Let me share a quick story. Last week, my friend brought his phone to me, fully expecting to pay a hundred dollars for a new battery.
I took a toothpick, cleaned the port, performed a quick force restart, and his phone charged properly. It took only two minutes, and it saved him a trip to the repair shop.
By following these initial three steps, you can rule out the most common bugs that cause false charging. In the next part, we will explore deeper hardware settings and power diagnostics to get your device back to perfect health.
Advanced Diagnostics to Decode Your Phone's Charging Signals
Sometimes, simple cleaning and cord swaps are not enough to fix a stubborn power issue. We need to go a step deeper into the internal settings of your smartphone.
To start your advanced search, you can read the official Google smartphone battery help page for quick tips. This guide offers insights on how power adapters regulate electrical current safely.
If you are using an iOS device, you should check the official Apple battery performance guide to understand system limitations. This helps you identify if a software safety setting is stopping power delivery at eighty percent.
Step 4: Boot Into Safe Mode to Isolate Software Glitches
Many people do not realize that newly installed apps can interfere with how a phone processes electricity. Some background apps consume power faster than your charger can provide it.
To test this, you can boot your Android phone into Safe Mode by holding down the power button until the menu pops up. Press and hold the restart option on your screen until the Safe Mode prompt appears.
While in Safe Mode, your phone runs only the original system apps that came with your device. If your battery percentage starts to rise normally in Safe Mode, a rogue app is causing your issue.
I recommend checking your list of recently installed apps and uninstalling them one by one. This simple trial-and-error method usually solves the false charging issue without needing a technical repair shop.
Step 5: Check Your Charger Output with a Software Diagnostic Tool
You do not need to buy expensive laboratory testing gear to check how much power your charger is delivering. You can use free diagnostic apps available in your app store to check the incoming voltage.
Search your app store for reliable charging diagnostics and install a highly-rated app. These utilities show you the exact electrical current entering your battery in milliamperes.
If the app shows a number lower than three hundred milliamperes, your phone is charging too slowly to register. This shows that your charging brick or USB cable is damaged and needs immediate replacement.
Step 6: Check Your Maximum Battery Health Percentage
Every smartphone battery slowly degrades with every single charge cycle. When the maximum health capacity drops below eighty percent, the battery chemistry becomes highly unstable.
This drop in health can trick the device software into displaying false charging states. To check this on an iPhone, go to your settings menu, select battery, and tap on battery health.
On Android devices, you can download safe utility apps to check your overall battery health score. If your battery capacity is extremely low, it might be time to get a professional battery replacement.
Step 7: Thermal Throttling and Temperature Management
Smartphones have built-in safety switches designed to protect the lithium cells from burning out. If your phone gets too hot, the internal motherboard stops the charging process completely.
When this safety lock is on, your screen will display the charging bolt but the battery percentage will stay the same. This is called thermal throttling, and it keeps your smartphone from catching fire.
Try charging your phone in a cool room and remove any bulky protective plastic cases first. Let the device rest for thirty minutes before plugging it back into the wall outlet.
Imagine leaving your smartphone on your car dashboard on a hot summer afternoon. The intense direct heat will trigger this safety lock instantly, causing the phone to stop drawing electrical power.
Step 8: Understanding Fast Charging Standards and Voltage Drops
Modern smartphones use complex fast-charging systems that dynamically adjust the incoming voltage. Your phone communicates with the wall block to request the exact amount of power it needs.
If you use an old power adapter that does not support these fast standards, the charging process will be incredibly slow. The phone might show the charging bolt symbol but fail to increase the battery percentage. Always check the wattage rating printed on your power adapter block before plugging it in. A standard modern smartphone usually requires at least fifteen to twenty-five watts to charge efficiently.
Using an underpowered charger is like trying to fill a swimming pool with a drinking straw. The flow of power is simply too weak to make a visible difference in your daily battery life.
Step 9: The Role of USB Power Delivery (PD) and USB-C Standards
The modern USB-C standard has made charging much faster and more unified across different devices. However, this standard requires high-quality copper shielding inside the cable to function properly.
Inexpensive copycat cables often bypass these strict USB-C standards to save manufacturing costs. This lack of compliance is why your phone says charging but refuses to take in real electrical current.
Investing in a certified USB-C cable with Power Delivery support ensures safe and steady current flow. This small choice protects your expensive battery from sudden voltage drops and electrical damage.
🔌 A Quick Laugh to Power You Up!
My phone and I actually have a lot in common these days.
We both love to sit quietly by the wall outlet, show a glowing green light, and look like we are working incredibly hard—when in reality, we are both operating on 2% mental battery and doing absolutely nothing.
Talk about a "false charging" lifestyle!
Protecting Your Device Budget with Proactive Maintenance
Keeping your smartphone running without unexpected failures is a great way to save money on expensive repairs. Unexpected repair bills from buying new smart devices can quickly drain your emergency cash reserves.
Much like spotting hidden structural flaws using major warning signs to spot in a home inspection, diagnosing your phone early saves you from massive costs later. A tiny amount of maintenance today keeps your tech working smoothly for years to come.
If you run a home business or a small digital store from your smartphone, sudden hardware downtime can be devastating. This sudden loss of communication is one of the main reasons why bootstrapped startups collapse early and cash flow fixes become necessary to keep your business alive.
Taking time to implement these basic hardware checks also protects your digital assets and online profiles. Securing your physical phone port is just as key as practicing easy security steps to secure your crypto wallet to block malicious threats.
Common Pitfalls and Mistakes to Avoid When Fixing Your Phone
When trying to fix a phone that says it is charging but won't hold power, many people panic. This panic leads to hasty decisions that can permanently ruin their valuable smartphones.
I have seen many users turn a minor charging port issue into an expensive hardware repair bill. Understanding what not to do is just as important as knowing how to clean the port properly. Don't sleep when your phone charging.
1. Scraping Your Charging Port with Sharp Metal Tools
The biggest mistake you can make is using a sewing needle, safety pin, or paperclip to clean the port. These tools are made of hard metal and can easily bend the small gold pins inside.
Bending these delicate pins makes it impossible for any cable to make a proper connection again. If you damage the port pins, you will have to pay for a costly motherboard replacement.
I once knew a friend who used a metal SIM ejector tool to clean his USB port. He scraped so hard that he broke the central plastic tongue, destroying the port completely in seconds.
2. Using Dangerous Extreme Temperature Tricks
Some online forums suggest placing your warm phone into a freezer for ten minutes to reset the battery. This is a very dangerous tip that creates internal condensation inside your phone.
When warm air inside the phone meets the freezing cold, small drops of water form on the electronic board. This water causes permanent short circuits and completely ruins your device.
Water and electricity do not mix well, especially inside a modern smartphone. Always let your device cool down naturally at room temperature under a gentle fan.
3. Relying on Low-Quality Counterfeit Chargers
It can be tempting to buy cheap chargers from local dollar stores or gas stations. However, these cables lack the basic safety microchips required to regulate high electrical current.
These low-quality accessories can cause sudden electrical surges that damage your smartphone battery controller. Always stick to original brands or certified accessories to keep your battery safe.
Using a cheap charger is like putting low-grade fuel into a high-performance sports car. It might run for a few miles, but eventually, it will damage the internal engine parts beyond repair.
4. Violently Shaking or Tapping the Phone Against Surfaces
If your phone is not charging, do not resort to tapping it against your desk or shaking it hard. Some users believe a loose internal connector can be snapped back into place this way.
In reality, physical force only risks cracking your fragile screen or damaging other internal camera components. Treat your high-tech device with gentle care and follow structured troubleshooting steps instead.
5. Running Blind Factory Resets Without Proper Data Backups
Some users assume that a complete software wipe will fix every possible charging issue immediately. They perform a factory reset without checking their physical cables or cleaning the dusty port first.
If the issue is actually hardware-related, a factory reset will not help you solve the problem. Instead, you will lose your important personal photos, contacts, and custom app configurations forever.
Always ensure you have a complete cloud backup before trying any drastic software troubleshooting. Try checking all physical factors first before resetting your entire digital life.
Taking Charge of Your Digital Power with Confidence
Solving a false charging problem does not have to be a stressful or highly expensive experience. By taking a methodical approach, you can easily find the root cause of the error.
Most of the time, the solution lies in a simple pile of pocket lint or a worn-out cable. You do not need to be a certified technician to solve these basic daily errors.
Remember to start with the easiest fixes first before moving on to advanced hardware checks. Cleaning the port, checking the cable, and performing a soft reset are simple habits that work.
By practicing these easy technical skills, you gain a deeper understanding of how your devices function. This knowledge saves you money and helps you assist friends facing the same issues.
Take a deep breath and start testing your charger and phone with these step-by-step methods today. With a little patience, you will have your smartphone running with a full battery in no time.
Five short nots:
- Inspect the Charging Port for Dust or Damage – A clogged or damaged charging port can interrupt the power connection. Carefully clean the port with a soft, non-metallic tool and check for bent pins.
- Test a Different Charger and USB Cable – Faulty charging accessories often cause false charging notifications. Use a certified charger and cable to rule out hardware issues before trying advanced fixes.
- Restart the Phone and Update the Software – Temporary software glitches can prevent the battery from charging correctly. Restart your device and install the latest system updates to fix potential bugs.
- Check Battery Health and Background Activity – An aging battery or power-hungry apps may stop the battery level from increasing even while charging. Review battery health and close unnecessary background processes.
- Reset Charging Settings or Seek Professional Repair – If the issue continues after basic troubleshooting, reset your phone's settings or visit an authorized repair center to diagnose battery, charging IC, or motherboard problems.
Disclaimer for the Tech & Gadgets Category:
"The technical tips, software solutions, and physical cleaning methods described in this guide are provided for educational and diagnostic purposes only. While these steps are generally safe, working with hardware ports, chargers, and system settings carries minor risks of device damage if performed incorrectly. Always handle your tech accessories with gentle care, and back up your critical data before trying any system diagnostics. This website is not responsible for any direct or indirect damage to your smartphone hardware resulting from the use of this guide. If you are unsure about performing these tasks, please consult a certified mobile device repair specialist."